User Management
Introduction
In this section you will learn how to create accounts, users, and role assignment with the Anchore Enterprise UI.
Assumptions
- You have a running instance of Anchore Enterprise and access to the UI.
- You have the appropriate permissions to create accounts, users, and roles. This means you are either a user in the admin account, or a user that already is a member of the account-users-admin role for your account.
For more information on accounts, users, roles, and permissions see: Role Based Access Control
Navigation
- After a successful login, navigate to the configuration tab on the main menu.

Creating Accounts
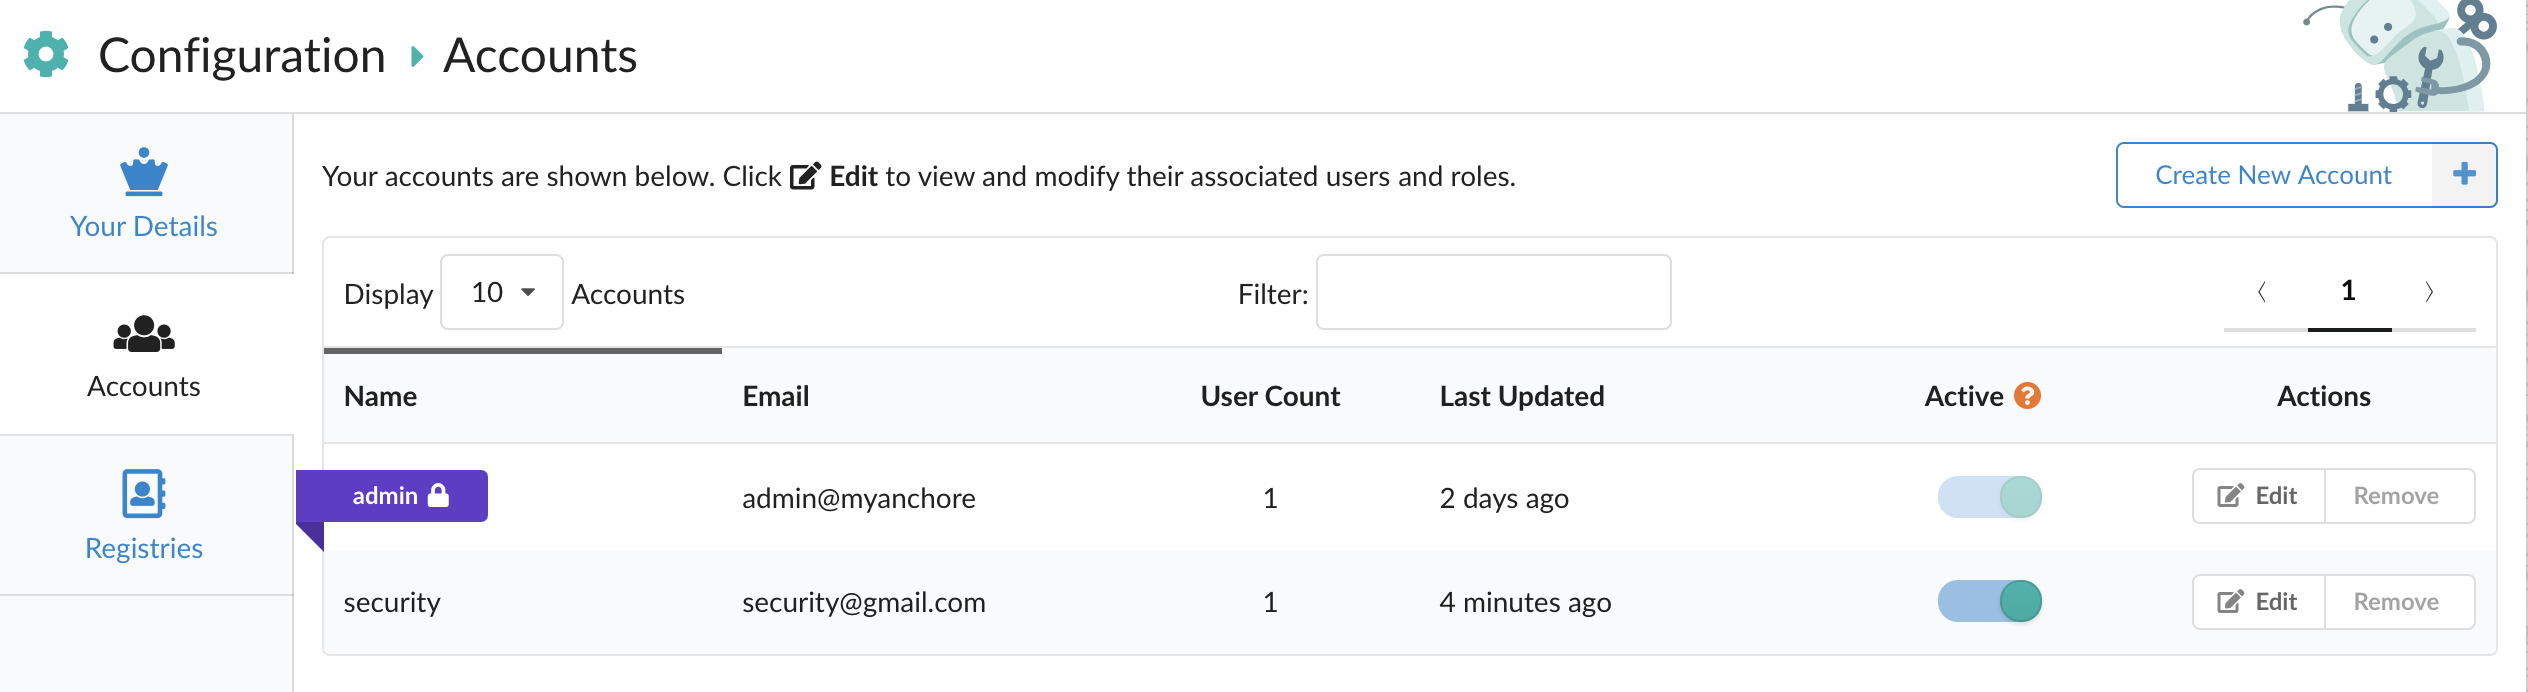
In order to create accounts, navigate to the accounts tab from inside the configuration view and select “Create New Account”.
Upon selection, a popup window will display asking for two items:
- Account Name (required)
- Email In the following example I’ve created a ‘security’ account:
Now that a group has been created, I can begin to add users to it.
Viewing Role Permissions
To view the permissions associated with a specific role using the UI, select an account, and navigate to the roles tab:
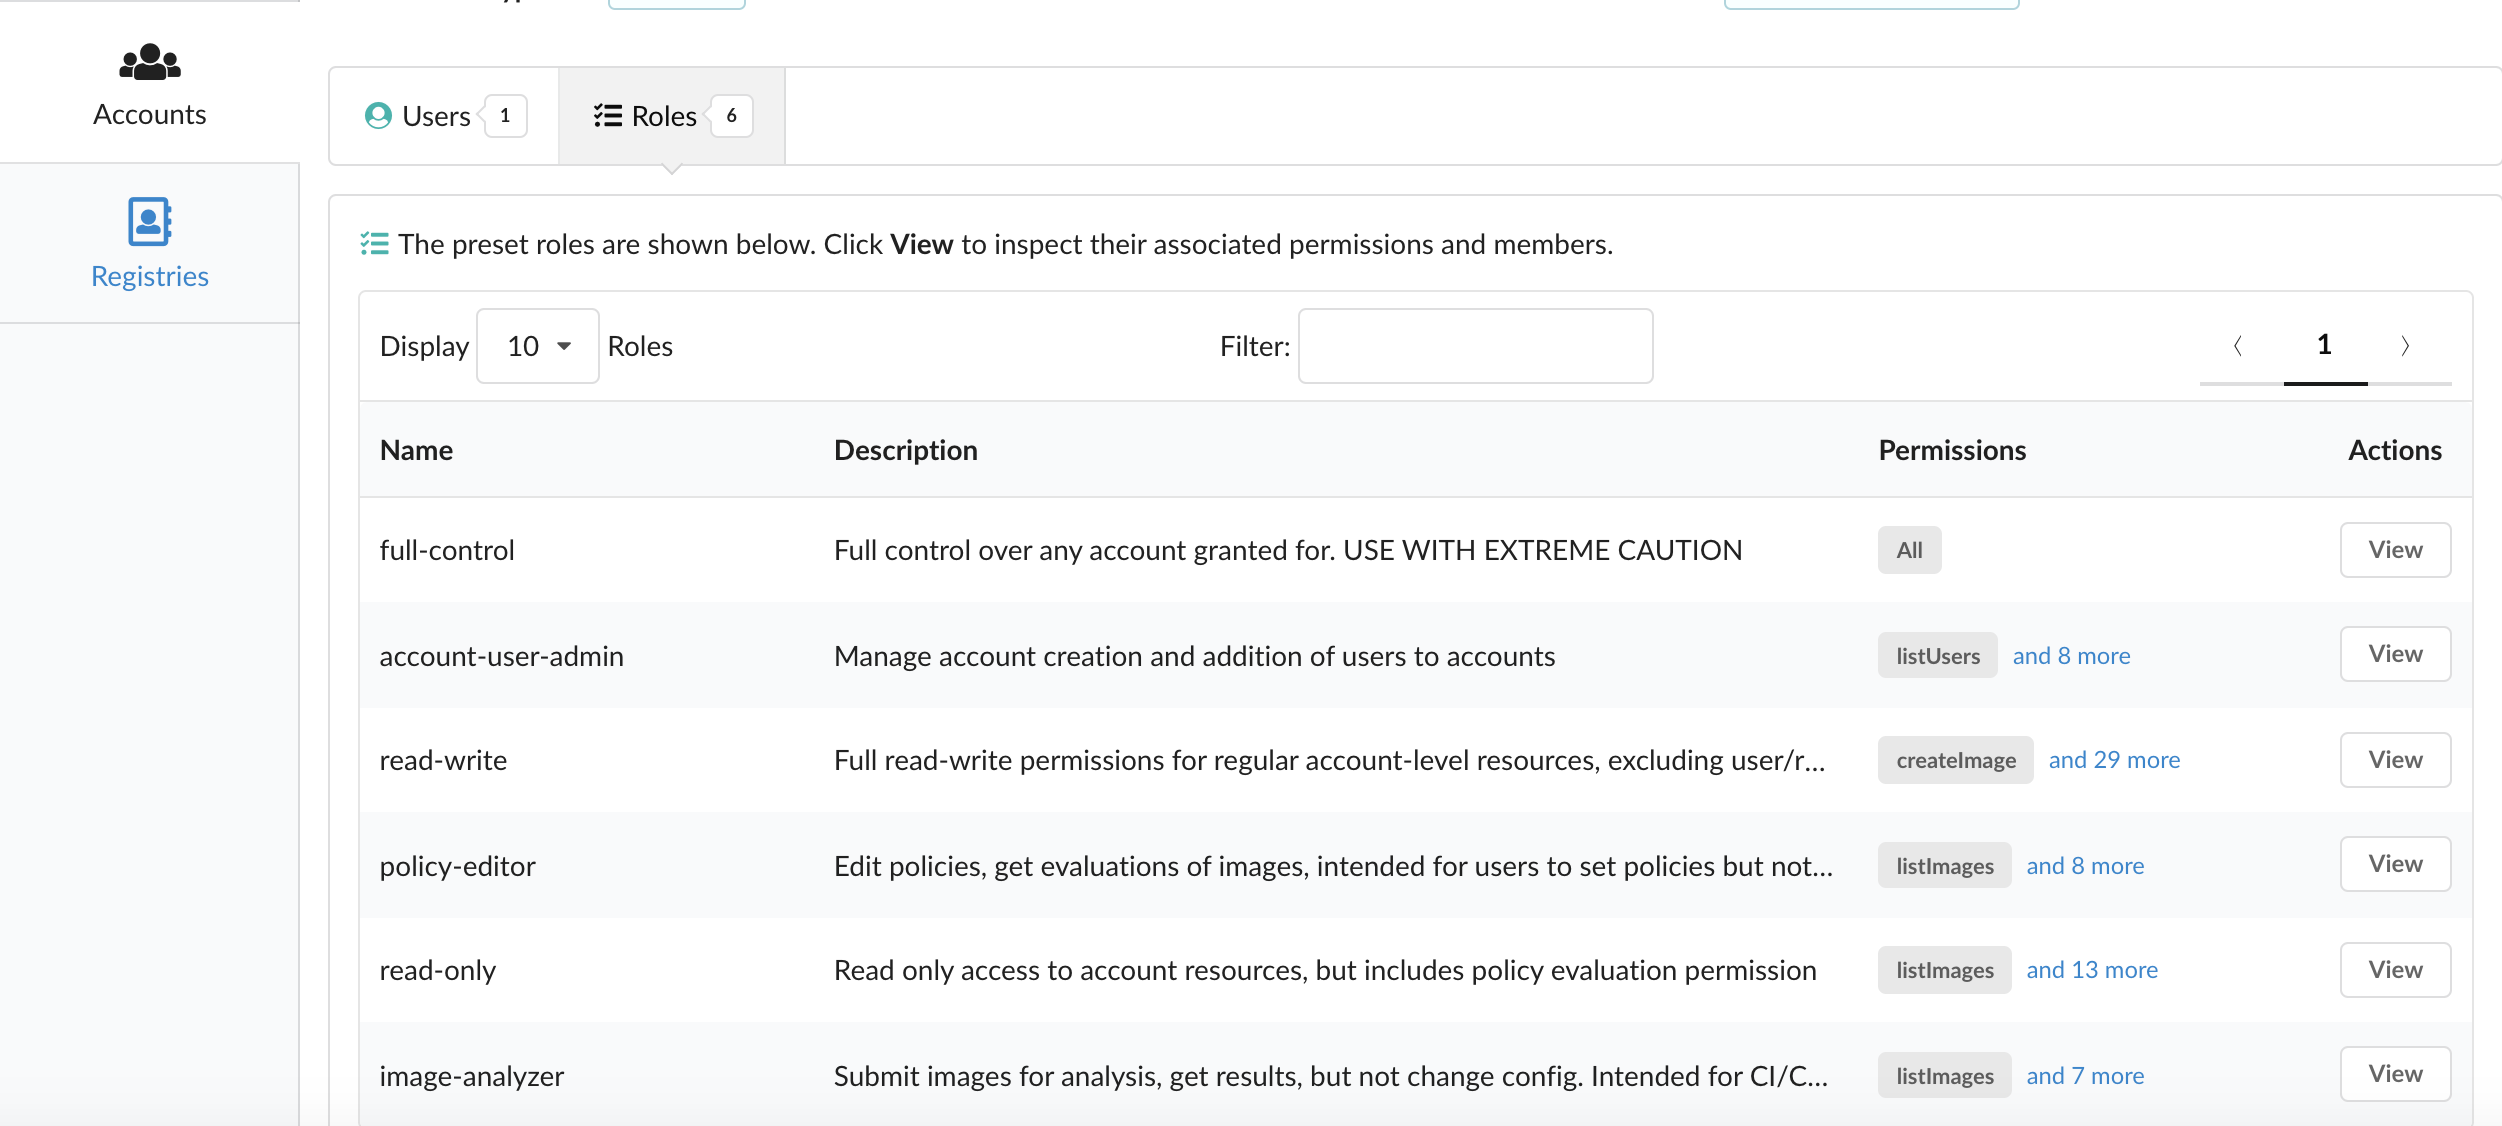
To view the members in the account assigned to a specific role, select the ‘View’ button on the right-hand side.
Creating Users and assigning Roles
Upon immediate creation of an account, there will, by default be zero users. To add users, select the edit button corresponding the account you would like to add users to. This will bring you to the account page, where you can add your first user by selecting the “Let’s add one!” button.
Upon selection, a popup window will display asking for three items:
- Username (required)
- Password (required)
- Assign Role(s)
- Note that you can assign more than one role to a user. For a normal user with full access to add, update, and evaluate images, we recommend assigning the read-write role. The other roles are for specific use-cases such as CI/CD automation, and read-only access for reporting. See: Role Based Access Control from more details on the roles and their capabilities.
In this case I’ve assigned three roles to the user:
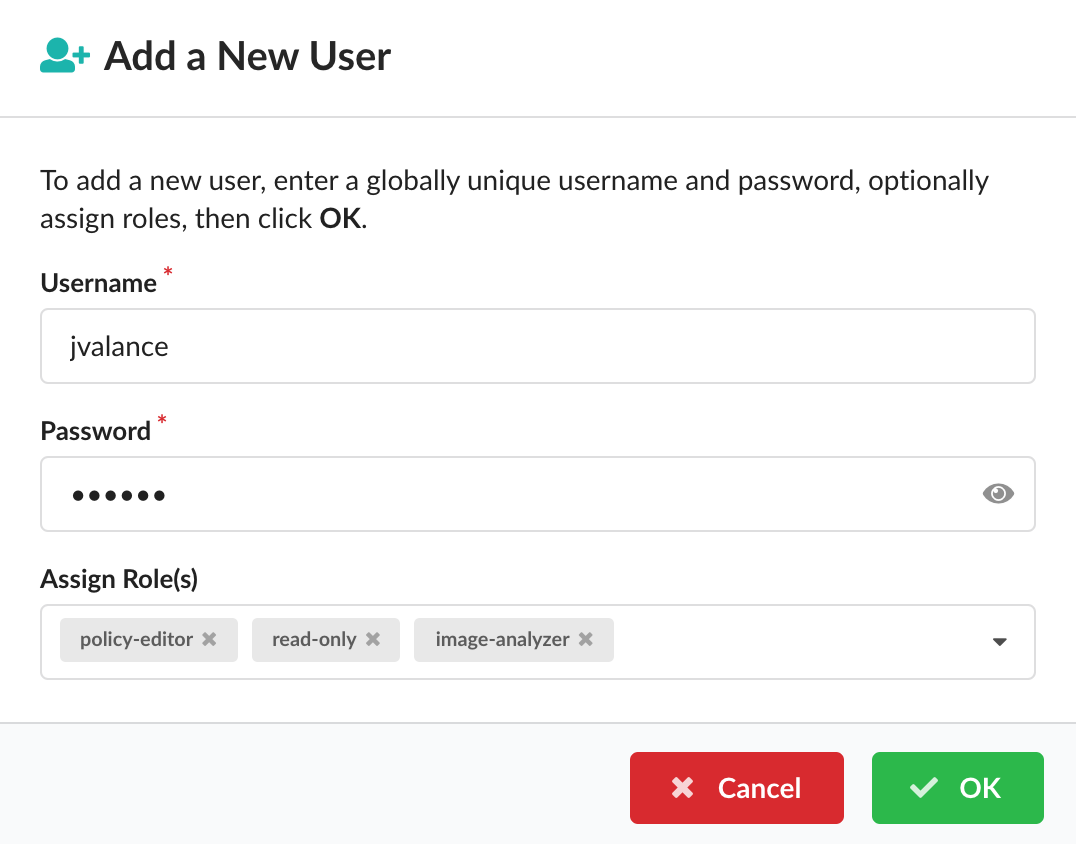
Once ‘OK’ is selected, the user will be created and you will be able to edit or remove the user as needed.
Deleting and Disabling Accounts
In order to delete an account, disable the account by sliding the button under the ‘Active’ column for the corresponding account, then select the ‘Remove’ button on the right-hand side.
A few notes to keep in mind when deleting accounts:
- The ‘admin’ account is locked and cannot be deleted.
- Once deletion is in progress, all resources (users, images, automated tasks, etc) will start a garbage collection process and won’t be viewable. Although it will still be present in the list to prevent admins from adding an account with the same name.
- Once deleted, an account and their associated resources can’t be recovered.
A couple notes on disabling accounts:
- Disabling accounts is a way for administrators to freeze an account while still keeping any associated analysis info intact.
- Any automated tasks associated with the disabled account will be frozen.
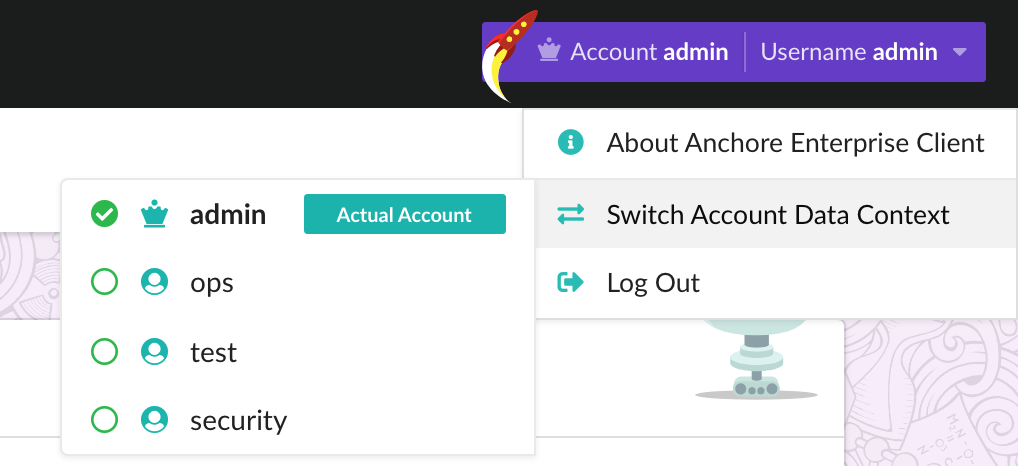
Switching Account Data Context
System administrator users are able to view another account’s data context using the dropdown located at the top-right:
Feedback
Was this page helpful?
Glad to hear it! Please tell us how we can improve.
Sorry to hear that. Please tell us how we can improve.