Introduction
An allowlist contains one or more exceptions that can be used during policy evaluation. For example allowing a CVE to be excluded from policy evaluation.
The Allowlist tab shows a list of allowlists present in the policy. Allowlists are an optional element of the policy, and a policy may contain multiple instances.

Add a New Allowlist
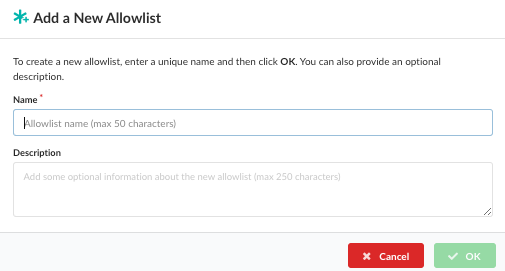
Click Add New Allowlist to create a new, empty allowlist.
Add a name for the allowlist. A name is required and should be unique.
Optional: Add a description. A description is recommended. Often the description is updated as new entries are added to the allowlist to explain any background. For example “Updated to account for false positive in glibc library”.
Upload or Paste an Allowlist
If you have a JSON document containing an existing allowlist, then you can upload it into Anchore Enterprise.
Click Import Allowlist to upload an allowlist. You can also manually edit the allowlist in the native JSON format.
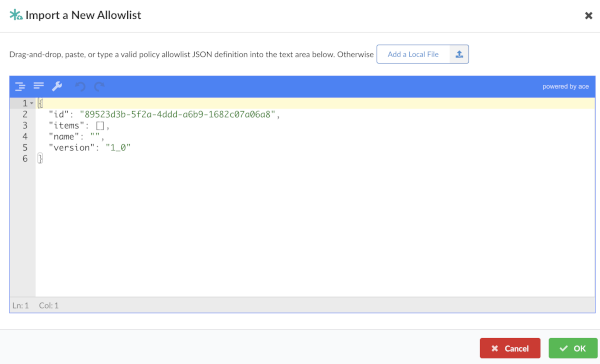
Drag an allowlist file into the dropzone. Or, you can click the “Add a Local File” button and load it from a local filesystem.
Click OK to upload the allowlist. The system will perform a validation for the allowlist. Only validated allowlists may be stored by Anchore Enterprise.
Example allowlist:
{
  "id": "allowlist1",
  "name": "My First Allowlist",
  "comment": "A allowlist for my first try",
  "version": "2",
  "items": [
    {
      "gate": "vulnerabilities",
      "trigger_id": "CVE-2018-0737+*",
      "id": "rule1",
      "expires_on": "2019-12-30T12:00:00Z"
    }
  ]
}
Copying a Allowlists
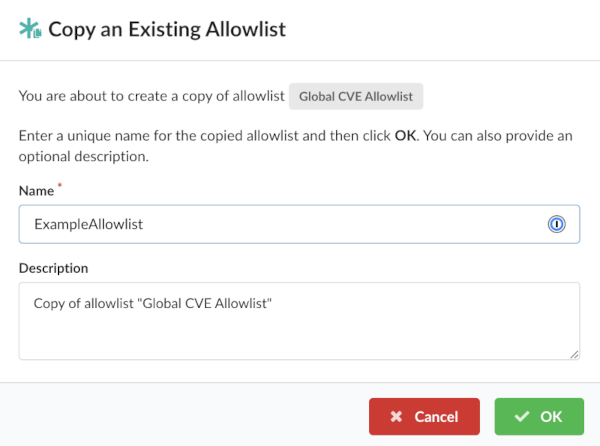
You can copy an existing allowlist, give it a new name, and use it for a policy evaluation.
From the Tools drop down, select Copy Allowlist.

Enter a unique name for the allowlist.
Optional: Add a description. This is recommended. Often the description is updated as new entries are added to the allowlist to explain any background.
Downloading Allowlists
You can download an existing allowlists as a JSON file. From the Tools drop down, click Download to JSON.

Editing Allowlists
The Allowlists editor allows new allowlist entries to be created, and existing entries to be edited or removed.
The components:
- Gate: The gate the allowlist matches from (ensures trigger_ids are not matched in the wrong context).
- Trigger Id: The specific trigger result to match and allowlist. This id is gate/trigger specific as each trigger may have its own trigger_id format. We’ll use the most common for this example: the CVE trigger ids produced by the vulnerability->package gate-trigger. The trigger_id specified may include wildcards for partial matches.
- id: an identifier for the rule, must only be unique within the allowlist object itself.
- Expires On: (optional) specifies when a particular allowlist item expires. This is an RFC3339 date-time string. If the rule matches, but is expired, the policy engine will NOT allowlist according to that match.
The allowlist is processed if it is specified in the mapping rule that was matched during policy evaluation and is applied to the results of the policy evaluation defined in that same mapping rule. If a allowlist item matches a specific policy trigger output, then the action for that output is set to go and the policy evaluation result notes that the trigger output was matched for a allowlist item by associating it with the allowlist id and item id of the match.
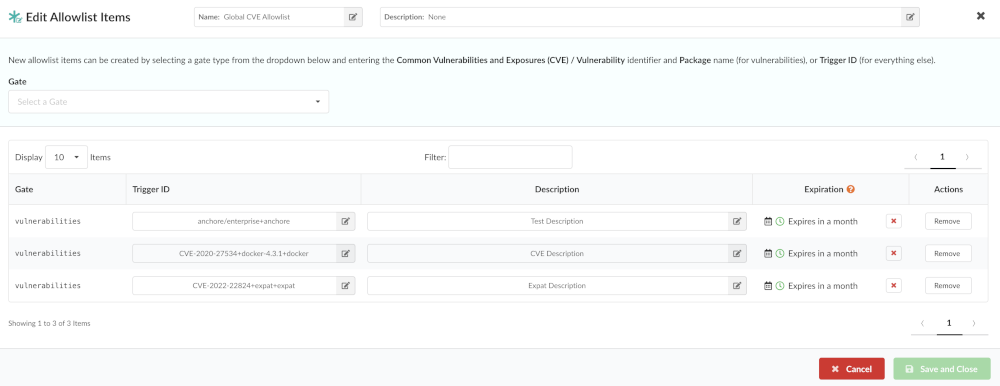
Choose an allowlist to edit, then click Edit.

Anchore Enterprise supports allowlisting any policy trigger, however the Allowlists editor currently supports only adding Anchore Security checks, allowing vulnerabilities to be allowlisted.
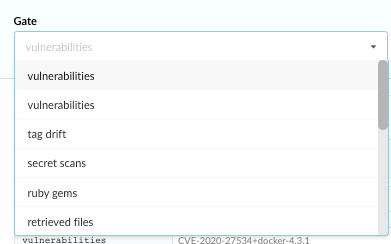
Choose a gate for the allowlist, for example, vulnerabilities.
A vulnerabilities allowlists entry includes two elements: A CVE / Vulnerability Identifier and a Package.
Enter a CVE / Vulnerability Identifier. The CVE/Vulnerability Identifier field contains the vulnerability that should be matched by the allowlists. This can include wildcards.

For example: CVE-2017-7246. This format should match the format of the CVEs shown in the image vulnerabilities report. Wildcards are supported, however, care should be taken with using wildcards to prevent allowlisting too many vulnerabilities.
Enter a package. The package name field contains the package that should be matched with a vulnerability. For example libc-bin.

Wildcards are also supported within the Package name field.
An allowlists entry may include entries for both the CVE and Package field to specify an exact match, for example: Vulnerability: CVE-2005-2541 Package: tar.
In other cases, wildcards may be used where a multiple packages may match a vulnerability. For example, where multiple packages are built from the same source. Vulnerability: CVE-2017-9000 Package: bind-*
In this example the packages bind-utils, bind-libs and bind-license will all be allowlisted for CVE-2017-9000.
Special care should be taken with wildcards in the CVE / Vulnerability Identifier field. In most cases a specific vulnerability identifier will be entered. In some exceptional cases a wild card in this field may be appropriate.
A good example of a valid use case for a wildcard in the CVE / Vulnerability Identifier field is the bind-license package. This package include a single copyright text file and is included by default in all CentOS:7 images.
CVEs that are reported against the Bind project are typically applied to all packages built from the Bind source package. So when a CVE is found in Bind it is common to see a CVE reported against the bind-license package. To address this use case it is useful to add an allowlists entry for any vulnerability (*) to the bind-license package.
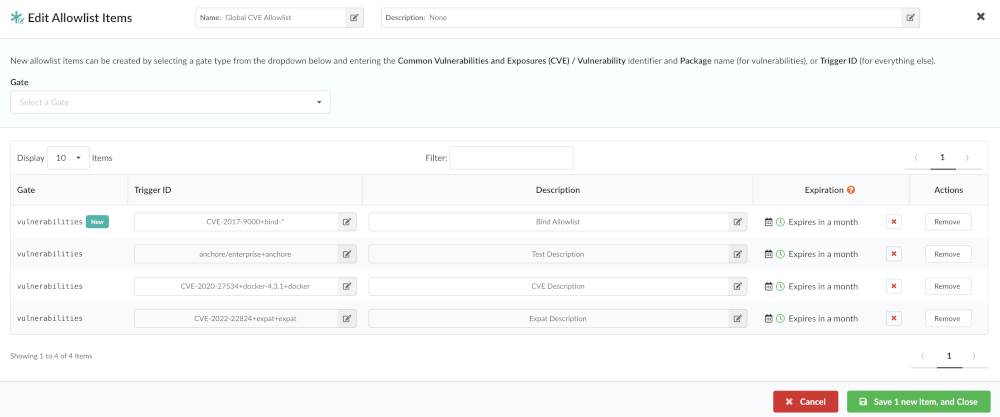
Optional: Click
 to edit an allowlist.
Optional: Click Remove to delete an allowlist.
Ensure that all changes are saved before exiting out of the Edit Allowlists Items Page. At that point the edits will be sent to Anchore Enterprise.