Configuring SAML SSO for Anchore with Microsoft Entra ID (formerly Azure Active Directory)
Azure Enterprise Applications allow identities from an Azure Directory to be federated via Single Sign On (SSO) to other applications. In doing so Azure is acting as a SAML Identity Provider (IdP) that can be used with Anchore Enterprise as a SAML Service Provider (SP).
Configuring Azure
Anchore supports multiple IDP configurations, each given a name. For this example we’ll choose the name “azure” for our configuration. This is important as that name is used in several URL paths to ensure that the correct configuration is used for validating responses, so make sure you pick a name that is meaningful to your users (they will see it in the login screen) and also that is url friendly.
Some config choices and assumptions specifically for this example:
- Let’s assume that you are running Anchore Enterprise locally. Anchore Enterprise UI is available at:
https://anchore.example.com. Replace with the appropriate url as needed. - We’re going to choose
azureas the name of this saml/sso configuration within Anchore. This will identify the specific configuration and is used in urls. - Based on that, the Single-SignOn URL for this deployment will be:
https://anchore.example.com/service/sso/auth/azure - Our SP Entity ID will use the same url:
https://anchore.example.com/service/sso/auth/azure
Azure Setup
Create a generic Enterprise Application in Azure.

Navigate to the Azure portal: https://portal.azure.com
Type “Enterprise Applications” into the search bar in the top middle of the screen and click on it.
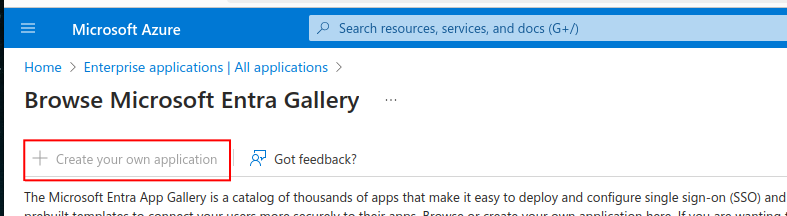
Click on Create your own application near the upper left.
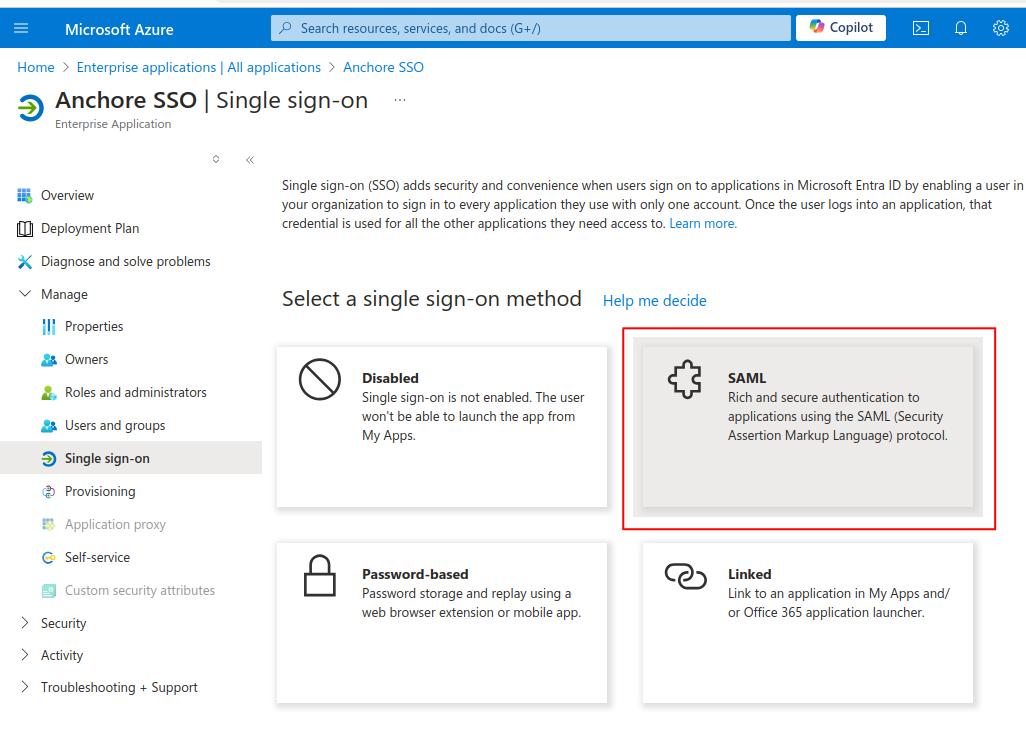
Select SAML as the single sign-on method.
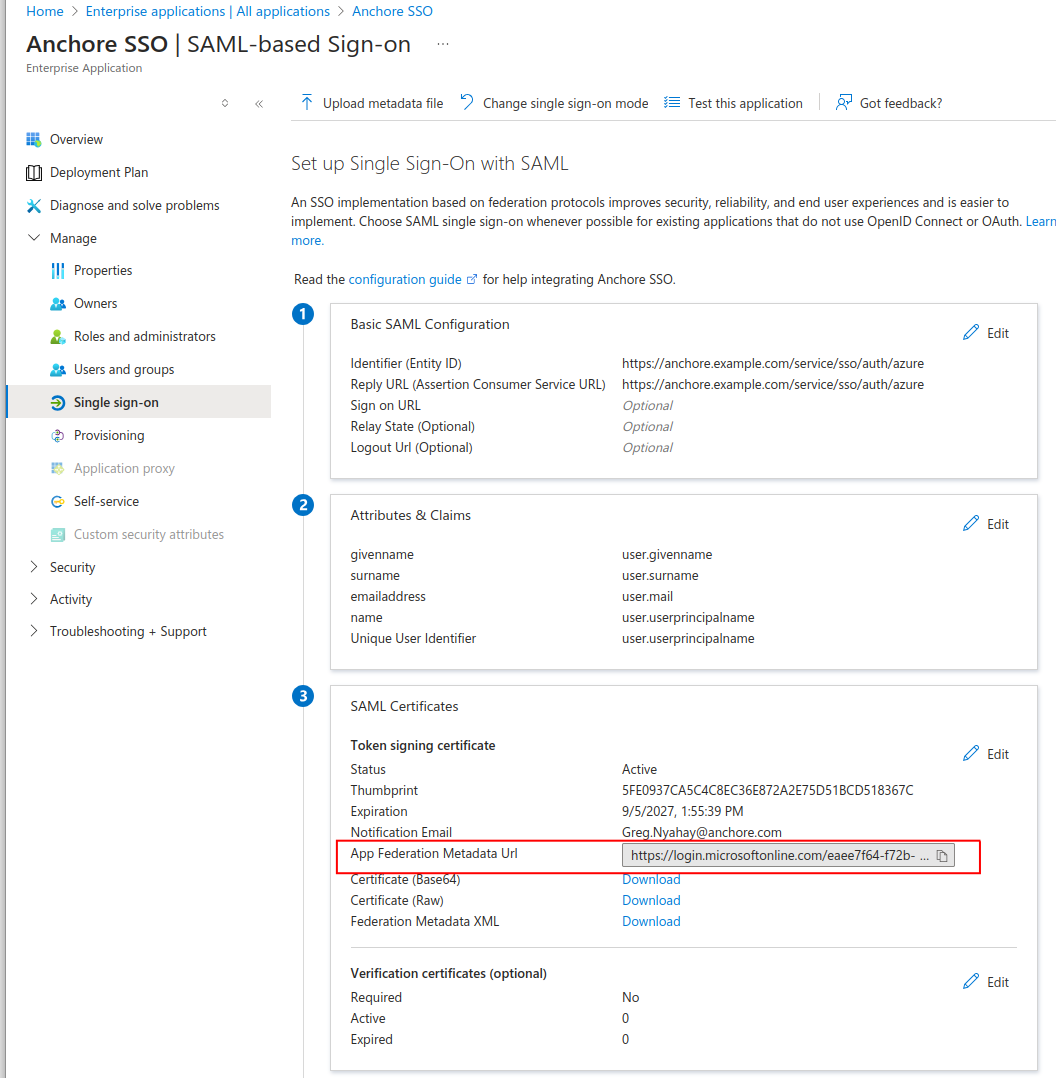
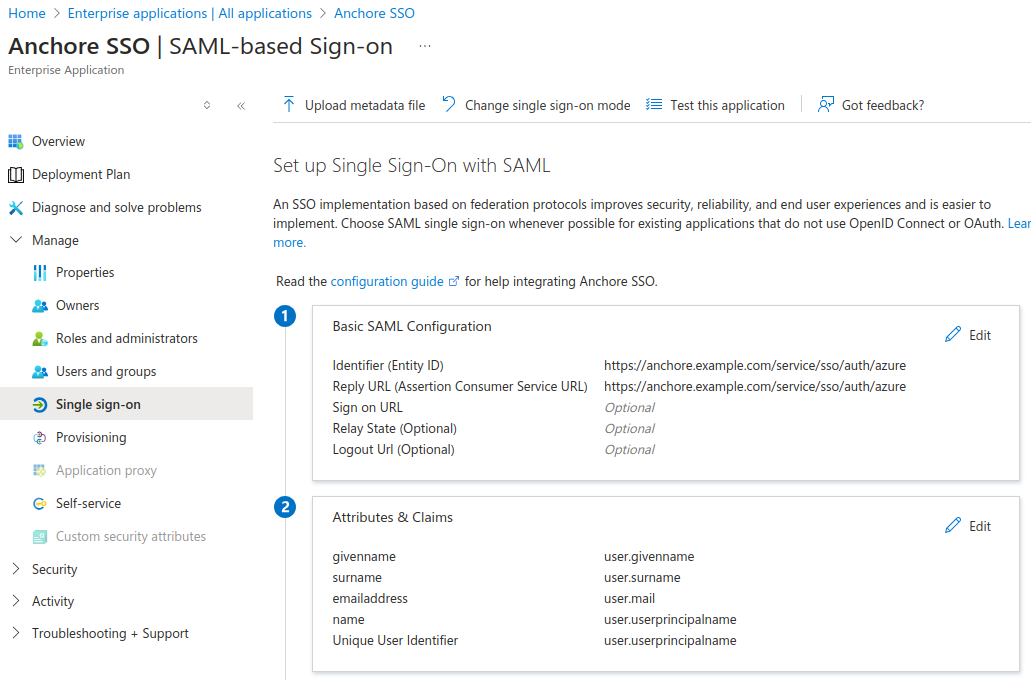
From your new Azure AD Enterprise Application select Single sign-on.
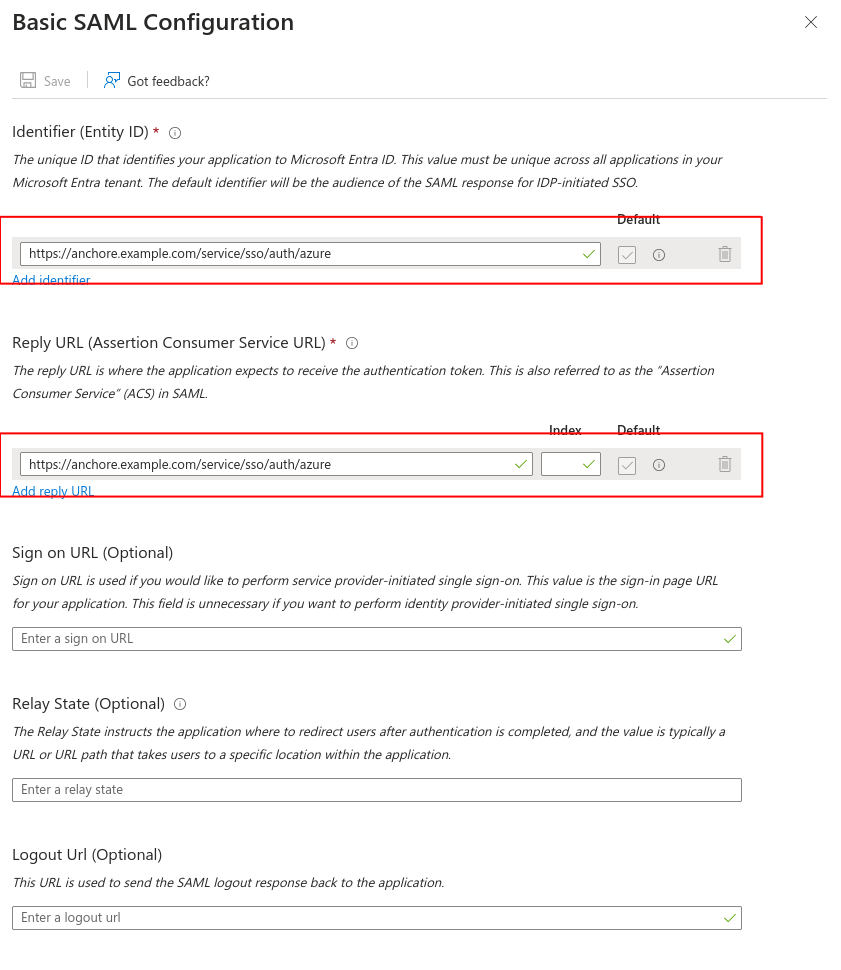
Select Edit Basic SAML Configuration (section 1).
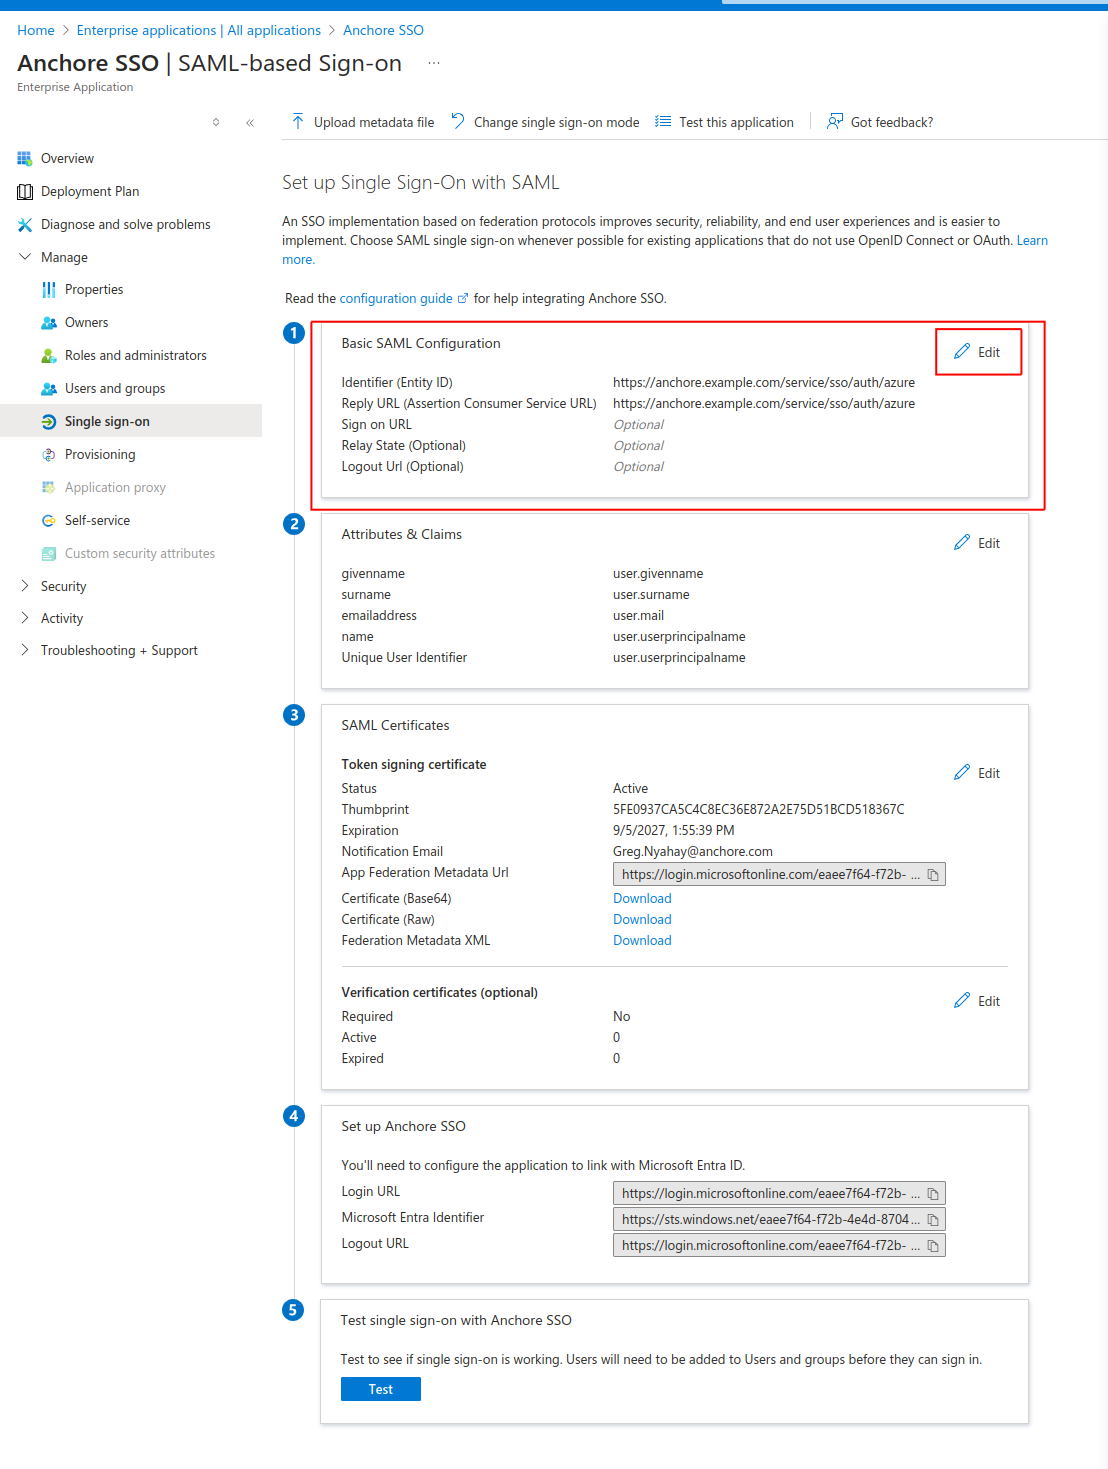
For both Identifier (Entity ID) & Reply URL (Assertion Consumer Service URL) enter the URL for your Anchore deployment along with: “/service/sso/auth/azure”. The word “azure” can be customized. This will become the name of the SSO configuration that users will see each time they login via SSO. Example URL: https://anchore.example.com/service/sso/auth/azure (Make note of the URL for upcoming steps) - Click Save when finished
Copy the “App Federation Metadata Url” found in section 3. This will be used in the next section.
Configure Users and Groups that will be allowed to login to Anchore.
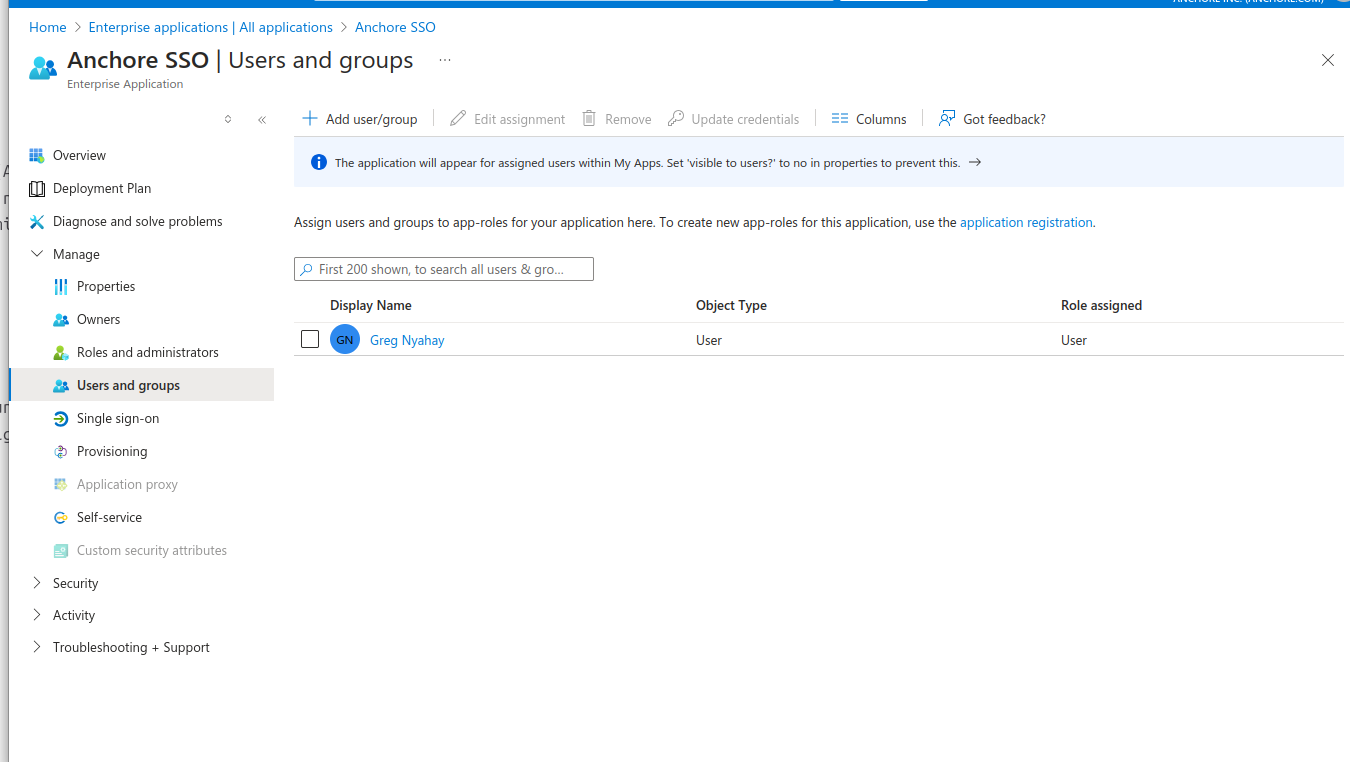
Select Users and groups under Manage.
Click Add user/group.
Click on the hyper-linked “None Selected”.
Select/Check users and/or groups who will be granted access to login to Anchore.
Press Select when finished.
Configure Anchore Enterprise to use the Azure Identity Provider
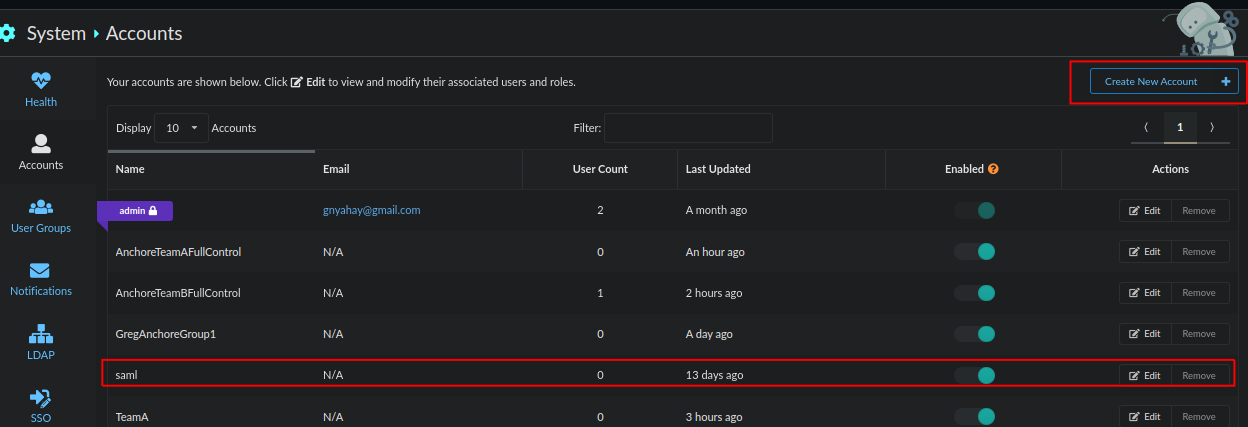
Ensure you have a non-admin Account created in Anchore. In this example I am creating an account named “saml” and setting it as the default account to create users who use this SSO configuration but do not already exist in Anchore.
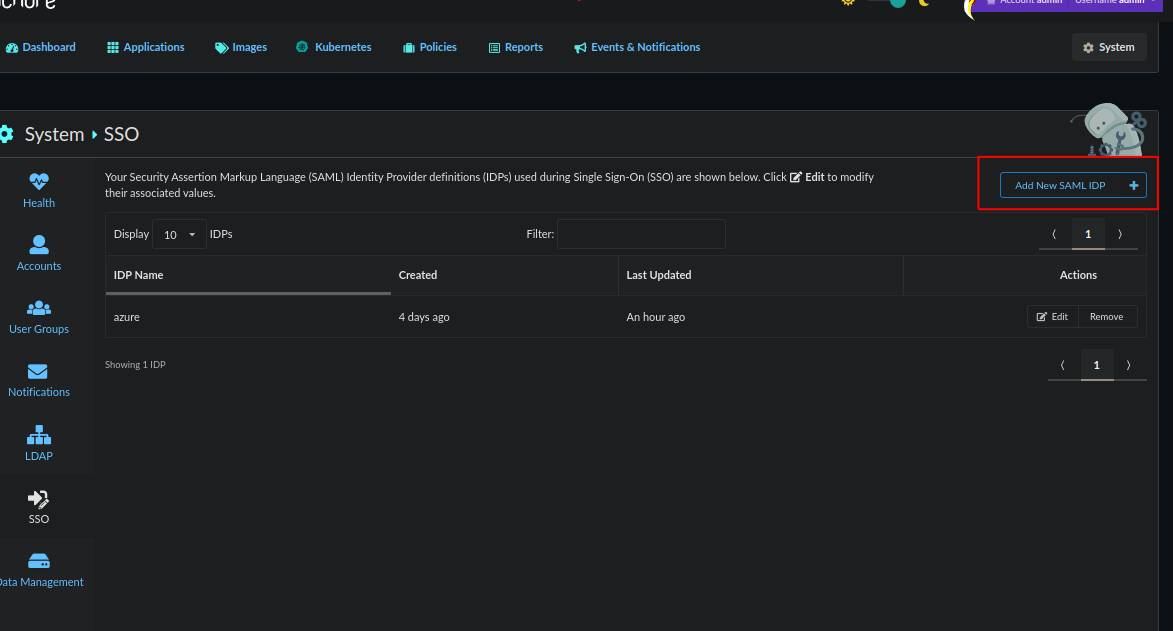
Login to Anchore and navigate to System, SSO and click on Add new SAML IDP.
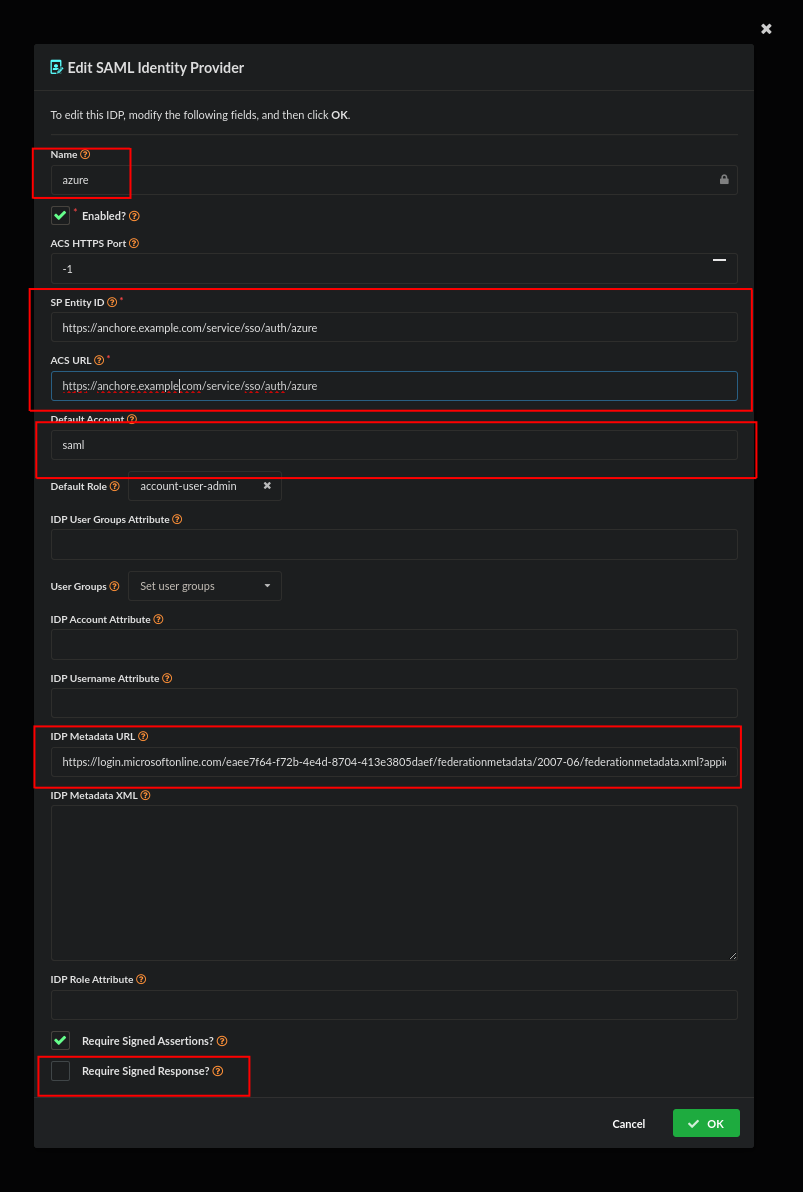
Enter the values (Note that all values can be changed except Name):
- Under “Name” enter “azure” or whatever you choose to name the SSO integration.
- Enter the URL (https://anchore.example.com/service/sso/auth/azure in this example) under “SP Entity ID” and “ACS URL”. This URL was known as Entity ID and Reply URL in Azure.
- Select the account created or selected in step 1 for “Default Account”.
- Select the appropriate role for “Default Role”.
- Paste the Federation Metadata URL from the previous section into “IDP Metadata URL”.
- Uncheck “Require Signed Response?”.
Save the configuration, configuration is complete when you see a login with ‘azure’ option on the login screen. Users can now log in to your Anchore deployment using this Azure endpoint.
See: Mapping Users and Roles in SSO for more information on using the account and role defaults, IDP attribute values and understanding how identities are mapped into Anchore’s RBAC system.
Using Azure Groups with Anchore User Groups
User groups in Anchore can grant users access to multiple Anchore accounts with varying/selectable access levels in each.
In this example we have two teams within the organization named TeamA and TeamB. We will create a group in Azure for each team that will be sent to Anchore upon SAML login where each team will have their own Anchore account. We can optionally grant each team read-only access to the other teams account.
To map groups from Azure to Anchore:
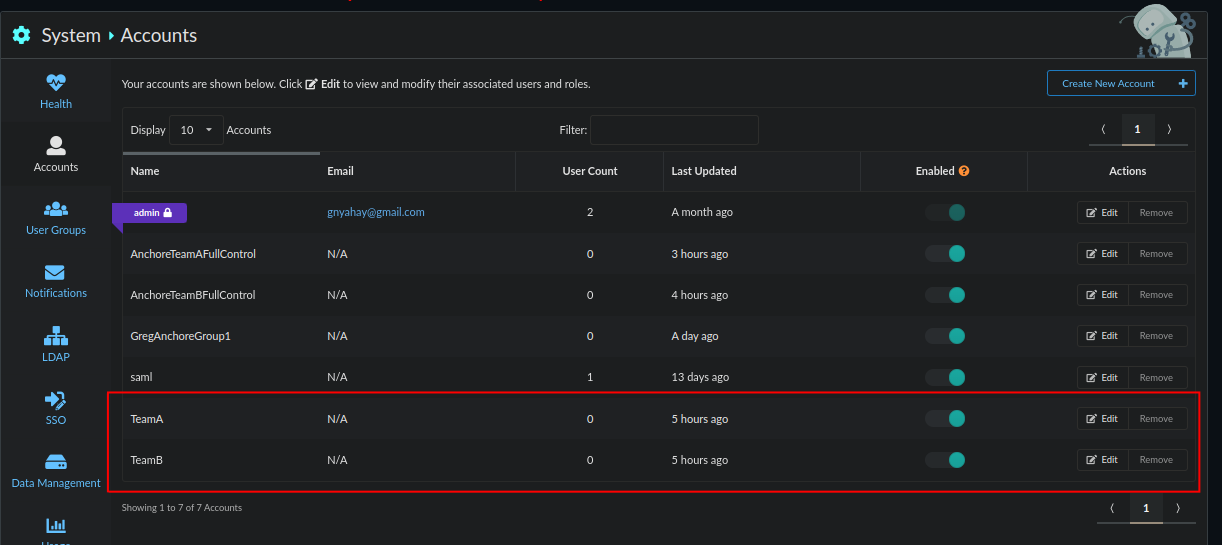
Create an account in Anchore for TeamA and TeamB.
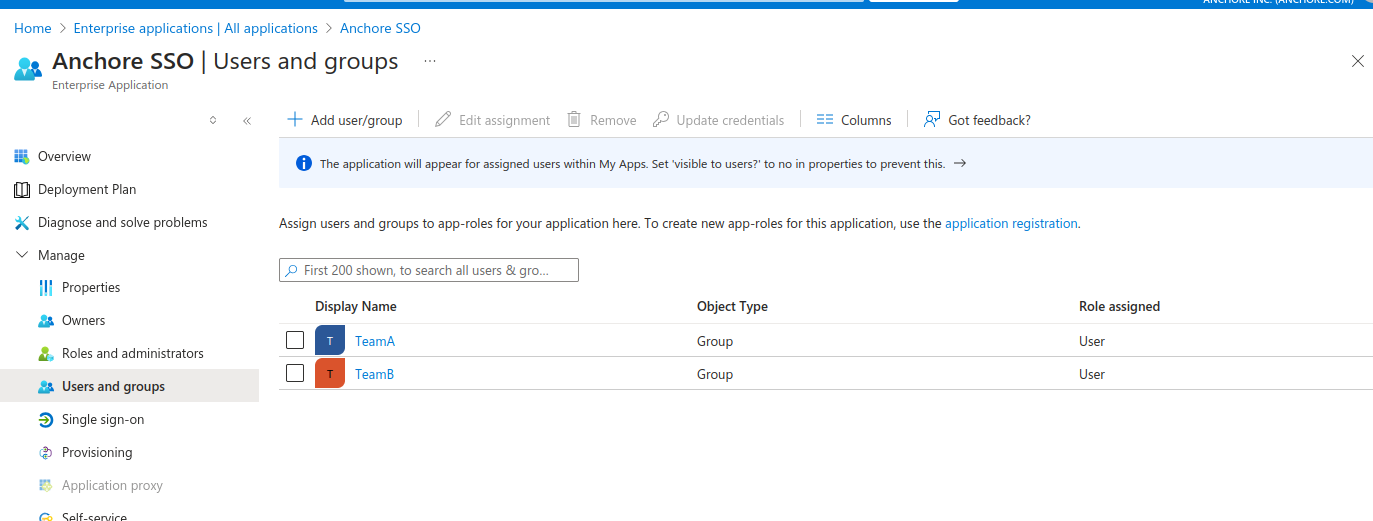
In Azure create or add desired groups to the “Users and Groups” section of your Anchore SSO Enterprise Application.
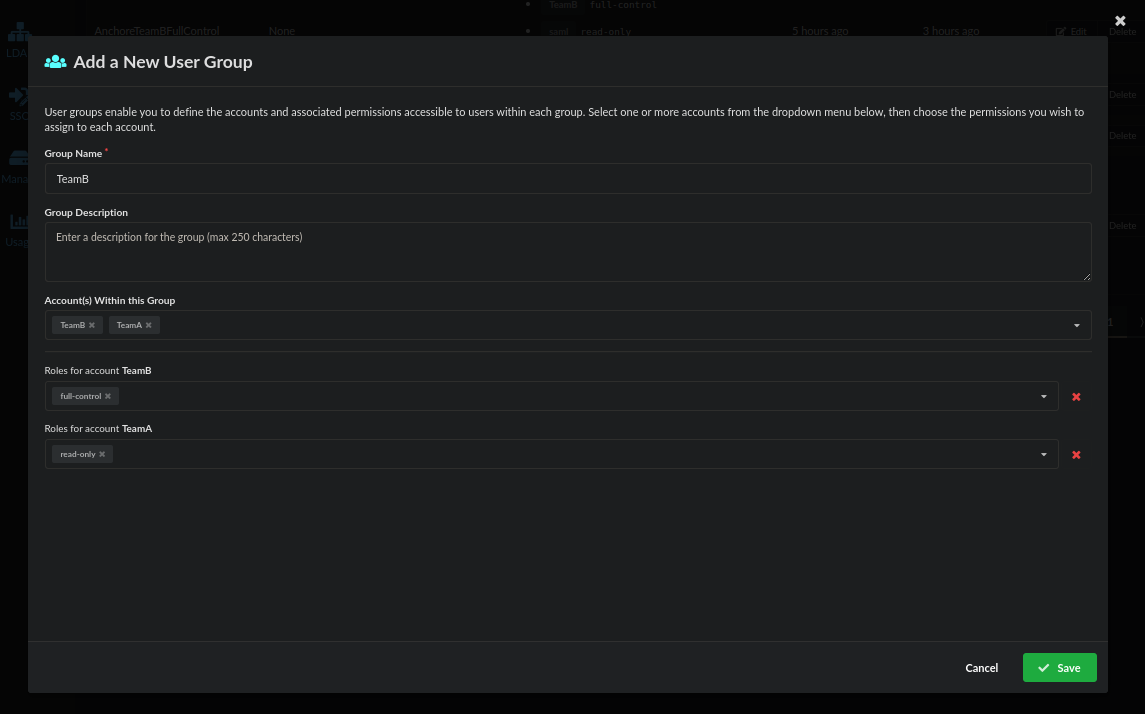
In Anchore create (a) user group(s) matching group names from Azure. Please note that the name of a user group cannot be changed but its contents can be changed at any time. For the sake of this example add both the TeamA and TeamB accounts. Grant the TeamA user group full control to the TeamA account and read-only to the TeamB account. When adding the user group for TeamB grant full-admin access to the TeamB account and read-only access to the TeamA account.
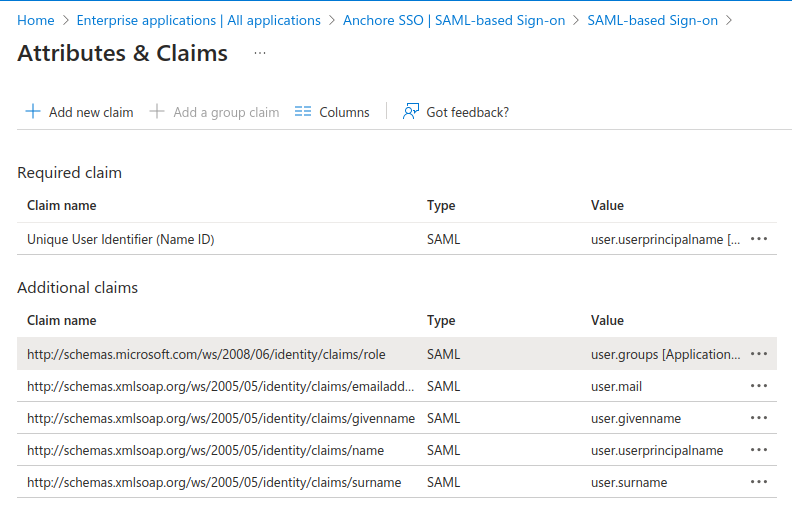
In your Azure Enterprise Application under Single Sign On select edit on Attributes and Claims, section 2.
Click on Add a group claim.
For “Which groups associated with the user should be returned in the claim” Select “Groups assigned to the application”
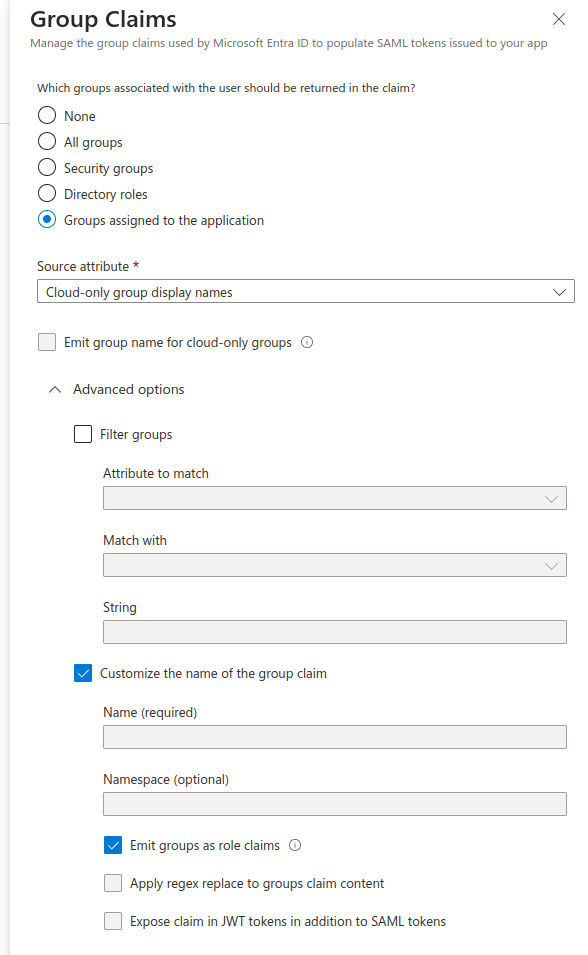
- For Source attribute select “Cloud-only group display names”
- Expand Advanced Options
- Check “Customize the name of the group claim”
- Check “Emit groups as role claims”
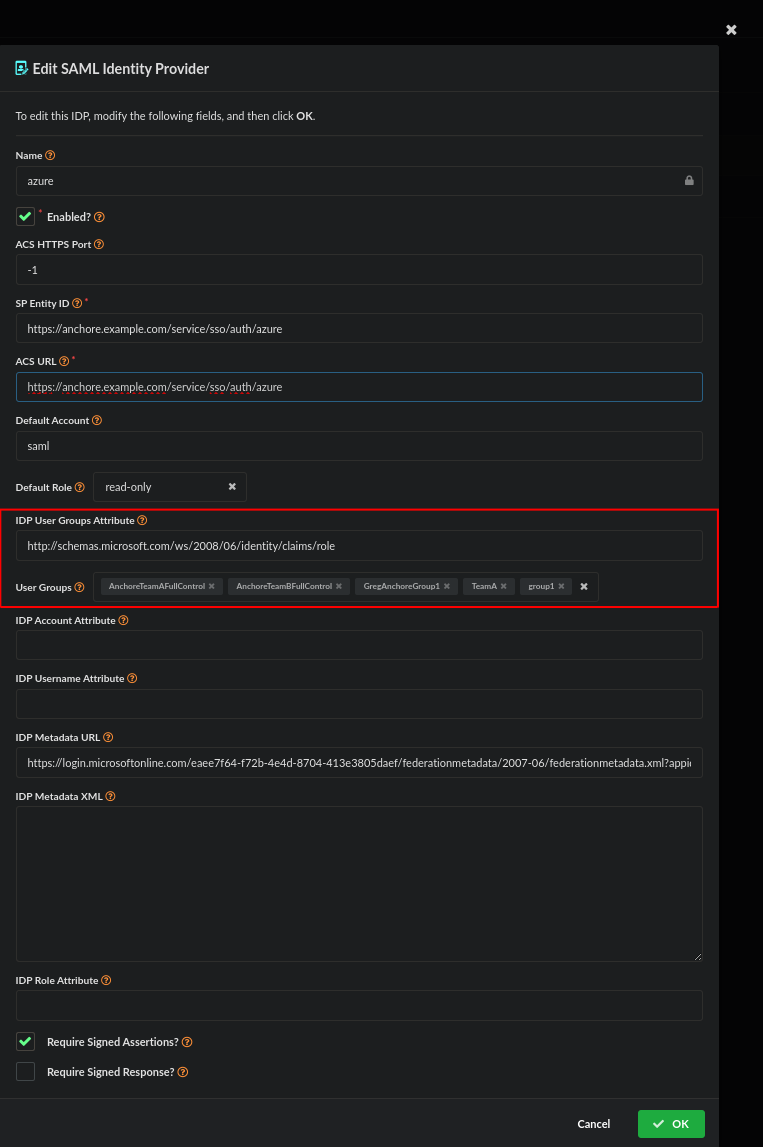
Edit your Anchore SAML Identity Provider and enter “http://schemas.microsoft.com/ws/2008/06/identity/claims/role" in the “IDP User Groups Attribute”. Under User Groups select TeamA and TeamB.
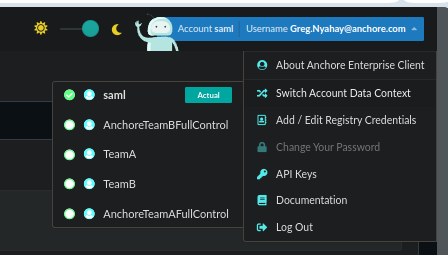
At this point when logging in via azure SSO a user will either land in the Default Account and need to switch account from the drop down in the upper right or if an IDP Account Attribute was configured to initially put them in the desired account they would only need to switch accounts appropriately.