Integrating Harbor
The Harbor Scanner Adapter for Anchore can be used to integrate Harbor with Anchore Enterprise. This scanner provides a gateway for Harbor to communicate with your Anchore Enterprise deployment thereby making it possible for jobs to be scheduled for scans through Harbor.
The adapter’s configuration can be customized using environment variables defined in the harbor-adapter-anchore.yaml.
You can edit this file to adjust the environment variables as needed to fit your deployment. You must configure how the adapter connects to Anchore. The following variables are compulsory to be configured:
ANCHORE_ENDPOINT
ANCHORE_USERNAME
ANCHORE_PASSWORD
Note: It is highly recommended that you create a new account in the Anchore deployment and a new user with credentials dedicated to the Harbor adapter. When using Enterprise 5+, you can also utilize api keys. Learn how to generate them here
For full Harbor Adapter configuration options, see here
Once you have edited the value file, use the updated file to deploy the Harbor Scanner Adapter by executing:
kubectl apply -f harbor-adapter-anchore.yaml
Once the adapter has been configured as shown above, you will need to add Anchore as the default scanner in Harbor.
Adding Anchore as default scanner
Setting Anchore as the default scanner in Harbor ensures that all image scans, unless specified otherwise, are automatically sent to your Anchore deployment for scanning. Follow the steps below to add Anchore as a scanner and set it as the default:
In the Harbor UI login as an admin and navigate to Administration->Interrogation Services->Scanners and click “+ New Scanner”. In older versions of Harbor, this can be found under Configuration->Scanners.
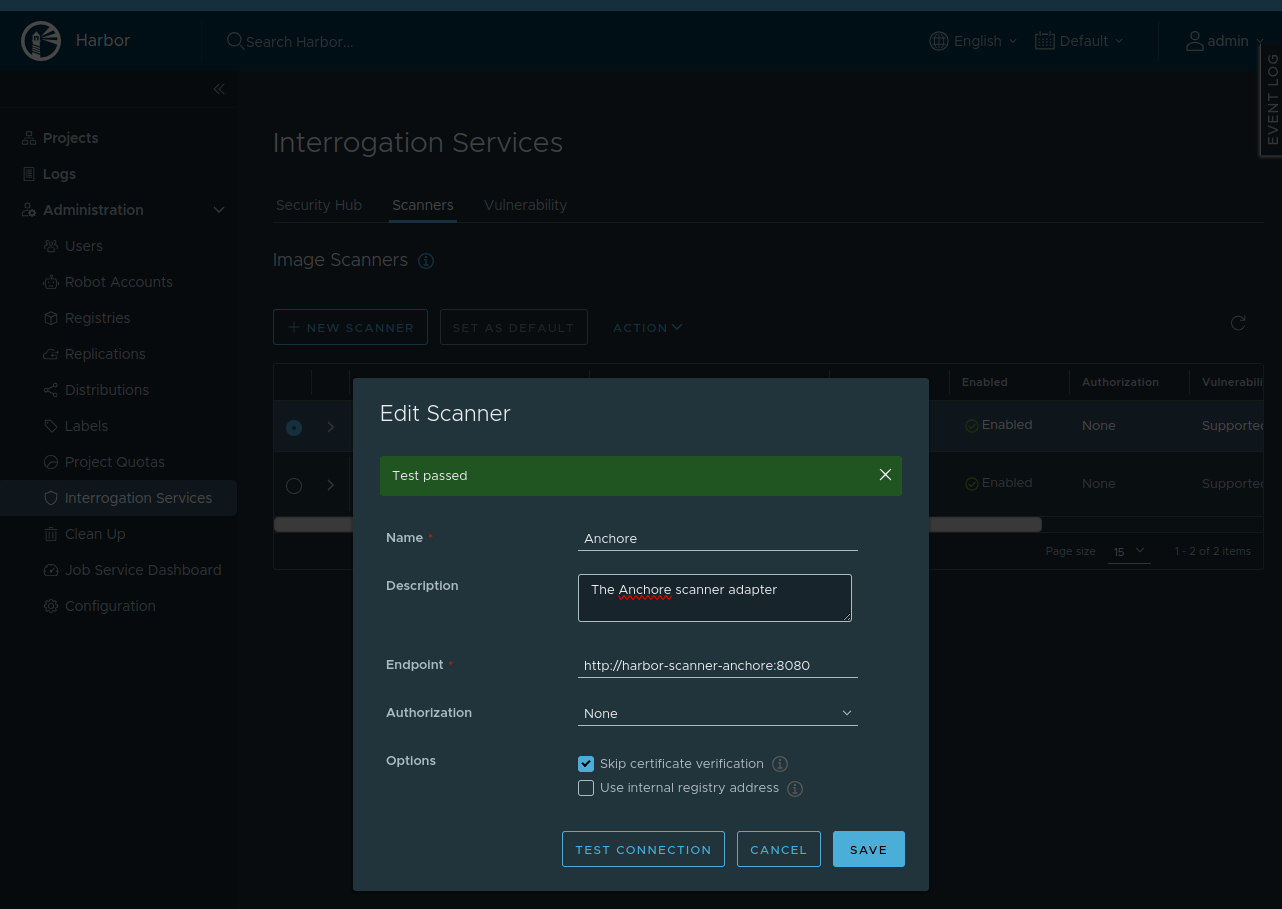
In ‘Endpoint’, use the adapter hostname/url. The default is the following:
http://harbor-scanner-anchore:8080
Leave the authorization field empty, as no API key was set in the adapter deployment environment for this example.
Please untick use internal registry address. Anchore could have issues accessing the Harbor registry otherwise
Click “Test Connection” to verify the connection. Then, click “Add” to add the scanner.
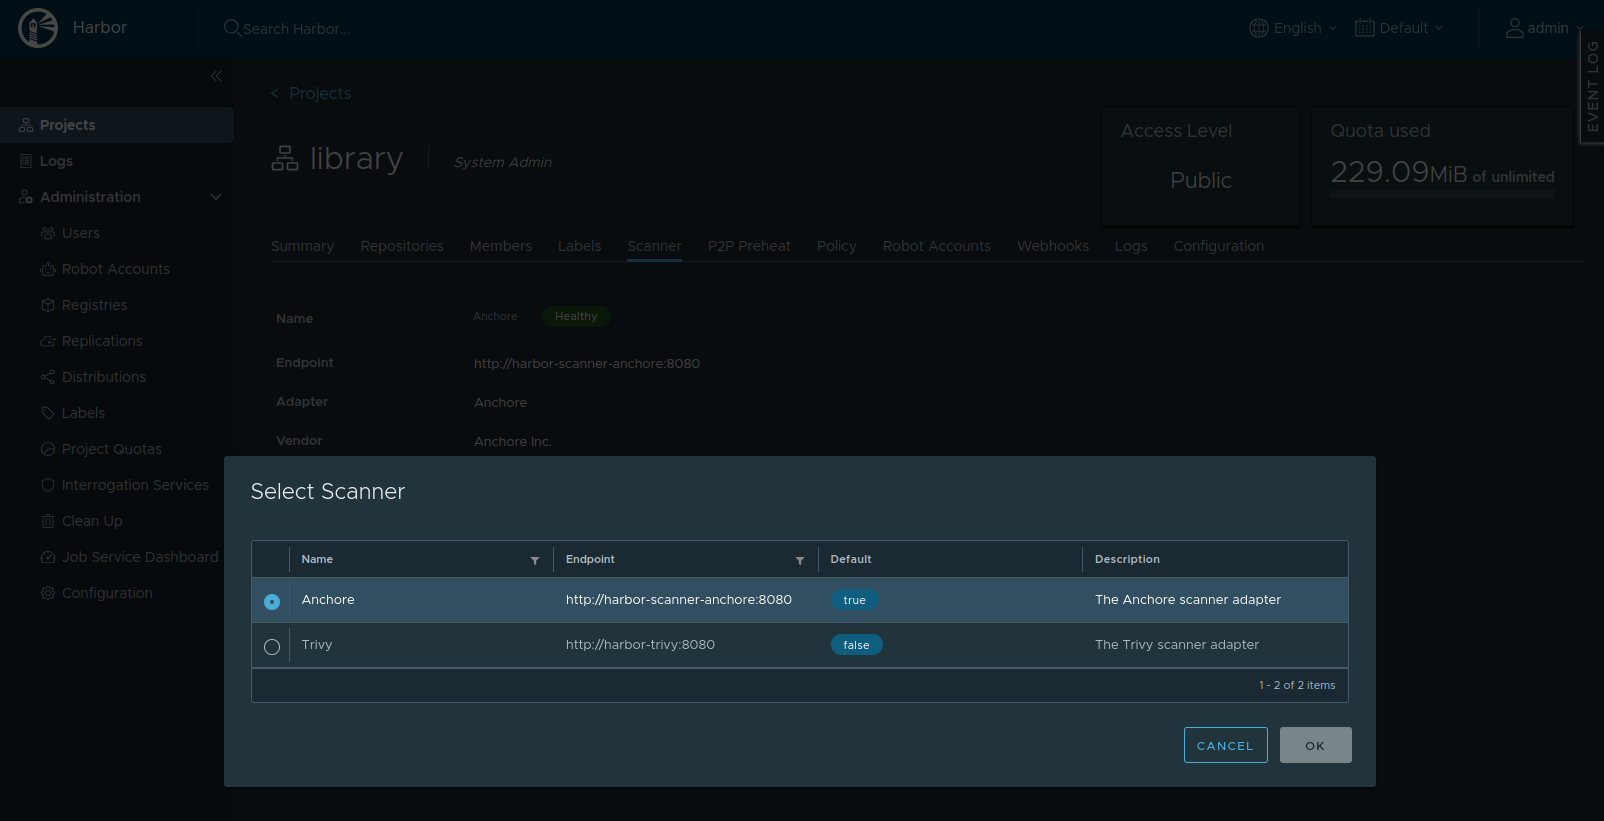
Now to ensure all projects in Harbor makes use of the newly configured Anchore scanner, you must make the Anchore scanner your default Scanner. In the Harbor UI, navigate to the project->scanner and click “Select Scanner” click on the radio button next to the selected Anchore Scanner to make it the default scanner.
Configuring Timeouts
Since Harbor and Anchore are separate systems, an API call is needed for communication between them. As a result, configuring timeouts may be necessary depending on factors such as your network, the proximity of the two systems, and overall latency.
The ANCHORE_CLIENT_TIMEOUT_SECONDS setting determines the timeout duration (in seconds) for API calls from the Harbor Adapter to the Anchore service. By default, it is set to 60 seconds. If the API call to Anchore exceeds this time, the scan may fail or be delayed. A shorter timeout can result in more frequent timeouts during scans, especially if the system is under heavy load or if Anchore’s response time is slower than expected.
The proximity of Anchore to the registry also plays a crucial role in scan performance. If Anchore is geographically distant or on a separate network from the registry, network latency could increase, leading to slower scan times or potential timeouts. Keeping Anchore close to the registry in terms of network topology can reduce latency, improving scan efficiency and reducing the likelihood of timeouts.
To increase the ANCHORE_CLIENT_TIMEOUT_SECONDS, set the environment variable in your harbor-adapter-anchore.yaml file and reaply it.
{
  "username": "harbor",
  "password": "harboruserpass123",
  "endpoint": "http://somehost",
  "timeoutseconds": 120,
  "tlsverify": false
}