Upgrade the Cloud Image
Occasionally, Anchore will release updates to the Anchore Enterprise Cloud Image (AECI) and the subsequent version of Anchore Enterprise shipped with it. Upgrades are managed through the Cloud Image Manager, which will provide you with the upgrades that are available and allow you to determine when you want to upgrade.
If an upgrade is available, the Cloud Image Manager will walk you through the upgrade process. The upgrade involves a period of downtime and reboots, and the Cloud Image Manager tells you what to expect before proceeding. This will allow you to plan for the upgrade when it is convenient for you.
Prepare for the Upgrade
AECI runs the Anchore Enterprise GUI, API, and database together on a single virtual machine instance. That unified topology shapes how you prepare: the services share one failure domain, so an upgrade briefly affects all of them at once, and a snapshot of the instance’s volumes captures the whole system (application, configuration, and data) as one consistent restore point.
Before you begin:
Review the release notes. Read the Anchore Enterprise Release Notes for the target version, with particular attention on the Requirements and Recommended Component Versions sections.
Schedule a maintenance window and notify users. The GUI and API will be unavailable while services restart; a typical installation should expect approximately 20 minutes of downtime.
Quiesce the system. Stop submitting new image scans and SBOM imports, and let in-flight analysis complete. Upgrading a quiet system keeps the database consistent and avoids cutting jobs off mid-run. To guarantee nothing new arrives during the window, consider temporarily blocking inbound traffic to the API and GUI in the instance’s network ingress rules (on platforms such as AWS, its security group) by removing the HTTPS (TCP 443) rule or restricting it to administrator addresses. Leave SSH (TCP 22) open, as it carries your Cloud Image Manager session, and restore the rule once you have verified the upgrade.
Confirm the system is healthy. Use the Cloud Image Manager System Status screen to check that all services are running, and note the currently deployed versions so you know your starting point if you need to roll back. Do not upgrade a degraded deployment; resolve service issues first.
Check disk space. The upgrade downloads new container images and may migrate data, so confirm there is free space on both the root and data volumes. If space is tight, expand the disks first; see Expand Disks.
Snapshot your volumes. It is best practice to stop an instance before snapshotting its root volume (on platforms such as AWS, this is the documented recommendation). Once the system is quiesced, stop the instance, create snapshots of both the root and data volumes using your platform’s snapshot mechanism, and start the instance again before beginning the upgrade. Snapshotting while stopped guarantees the whole system, application, configuration, and data, is captured in a consistent state; the snapshots are your recovery point if the upgrade needs to be rolled back. Note that stopping and starting extends the maintenance window, and the instance’s public IP address may change unless you have assigned a static address (such as an Elastic IP on AWS). See Backups for broader backup and restore guidance.
Change one thing at a time. Do not combine the upgrade with other changes to the instance, such as resizing it or expanding disks, in the same window. If those are needed, complete and verify them before you upgrade.
Upgrade using the Cloud Image Manager
Step 1: Connect to the Cloud Image Manager
Connect over SSH using your key pair and the instance address:
ssh -i ~/my-keypair.pem anchore@<instance-ip>
See Access the Cloud Image Manager for connection details and troubleshooting.
Step 2: Confirm Service Health
Review the System Status screen to confirm all services are healthy, and note the currently deployed versions.
Step 3: Open the Upgrade Screen
If upgrades are available for your deployment, the Updates available button in the Cloud Image Manager is highlighted yellow. Select it to open the upgrade screen.
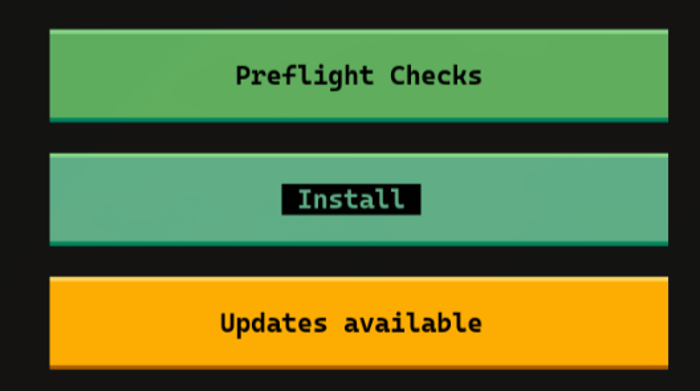
The Updates available button is highlighted yellow when an upgrade is ready.
Step 4: Run the Upgrade
The upgrade screen summarizes what to expect: the upgrade results in a period of downtime and reboots, with a typical installation expecting approximately 20 minutes of downtime. The Cloud Image Manager will prompt you to ensure you have taken your snapshots; it does not create them for you, so confirm the snapshots from your preparation are complete before you continue.
Select Start Upgrade and let the Cloud Image Manager run the upgrade to completion. Keep your SSH session open and do not interrupt the process while the upgrade is in progress.
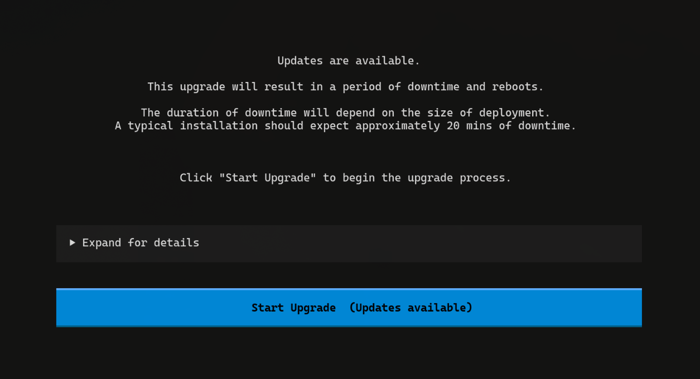
Select Start Upgrade to begin. The screen notes the expected downtime for the upgrade.
Step 5: Verify the Result
When the upgrade finishes, the Cloud Image Manager shows Upgrade complete. Validate the system status in the Cloud Image Manager by opening the System Status screen and confirming that all services are running and the new versions are deployed.
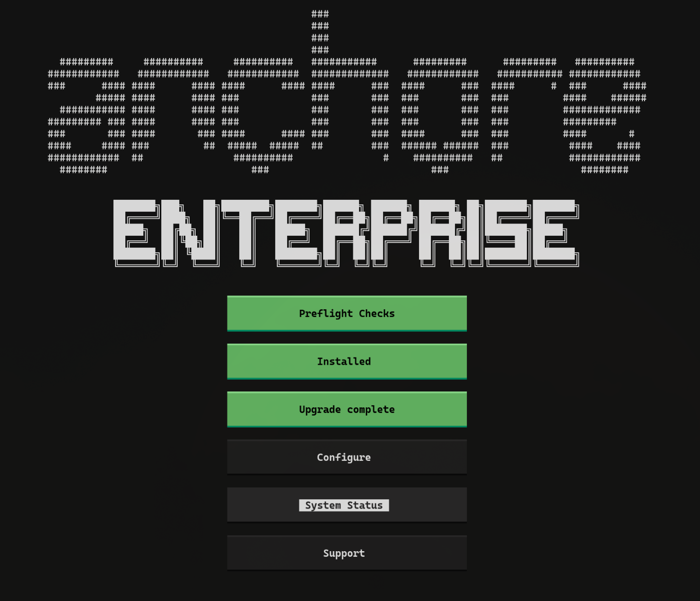
The Cloud Image Manager shows Upgrade complete when the upgrade has finished.
Consider running a smoke test before handing the system back, for example logging in to the Anchore Enterprise GUI and scanning a known image. Then conduct any tasks needed to make the system available to users again, such as restoring the network ingress rules you changed during preparation and resuming paused CI/CD pipelines and integrations.
Roll Back if Needed
If the upgrade fails or the system does not come back healthy, the volume snapshots from your preparation are your recovery point into a new instance of the appliance. Contact Anchore Customer Success via support.anchore.com for assistance with restoring or troubleshooting.
Last modified August 11, 2026