Overview
Use the Report Manager view to create custom queries, set a report to run on a schedule (or store the configuration for future use), and get notified when they’re executed in order to receive the insights you’re interested in for account-wide artifacts. The results are provided through a variety of formats - tabular, JSON, or CSV - and rely on data retrieved from the back-end Enterprise Reporting Service.
Note: Because the reporting data cycle is configurable, the results shown in this view may not precisely reflect actual analysis output at any given time.
For more information on how to modify this cycle or the Reporting Service in general, please refer to the Reporting Service documentation.
The following sections in this document describe templates, queries, scheduling reports, and viewing your results.
Report Manager
Templates
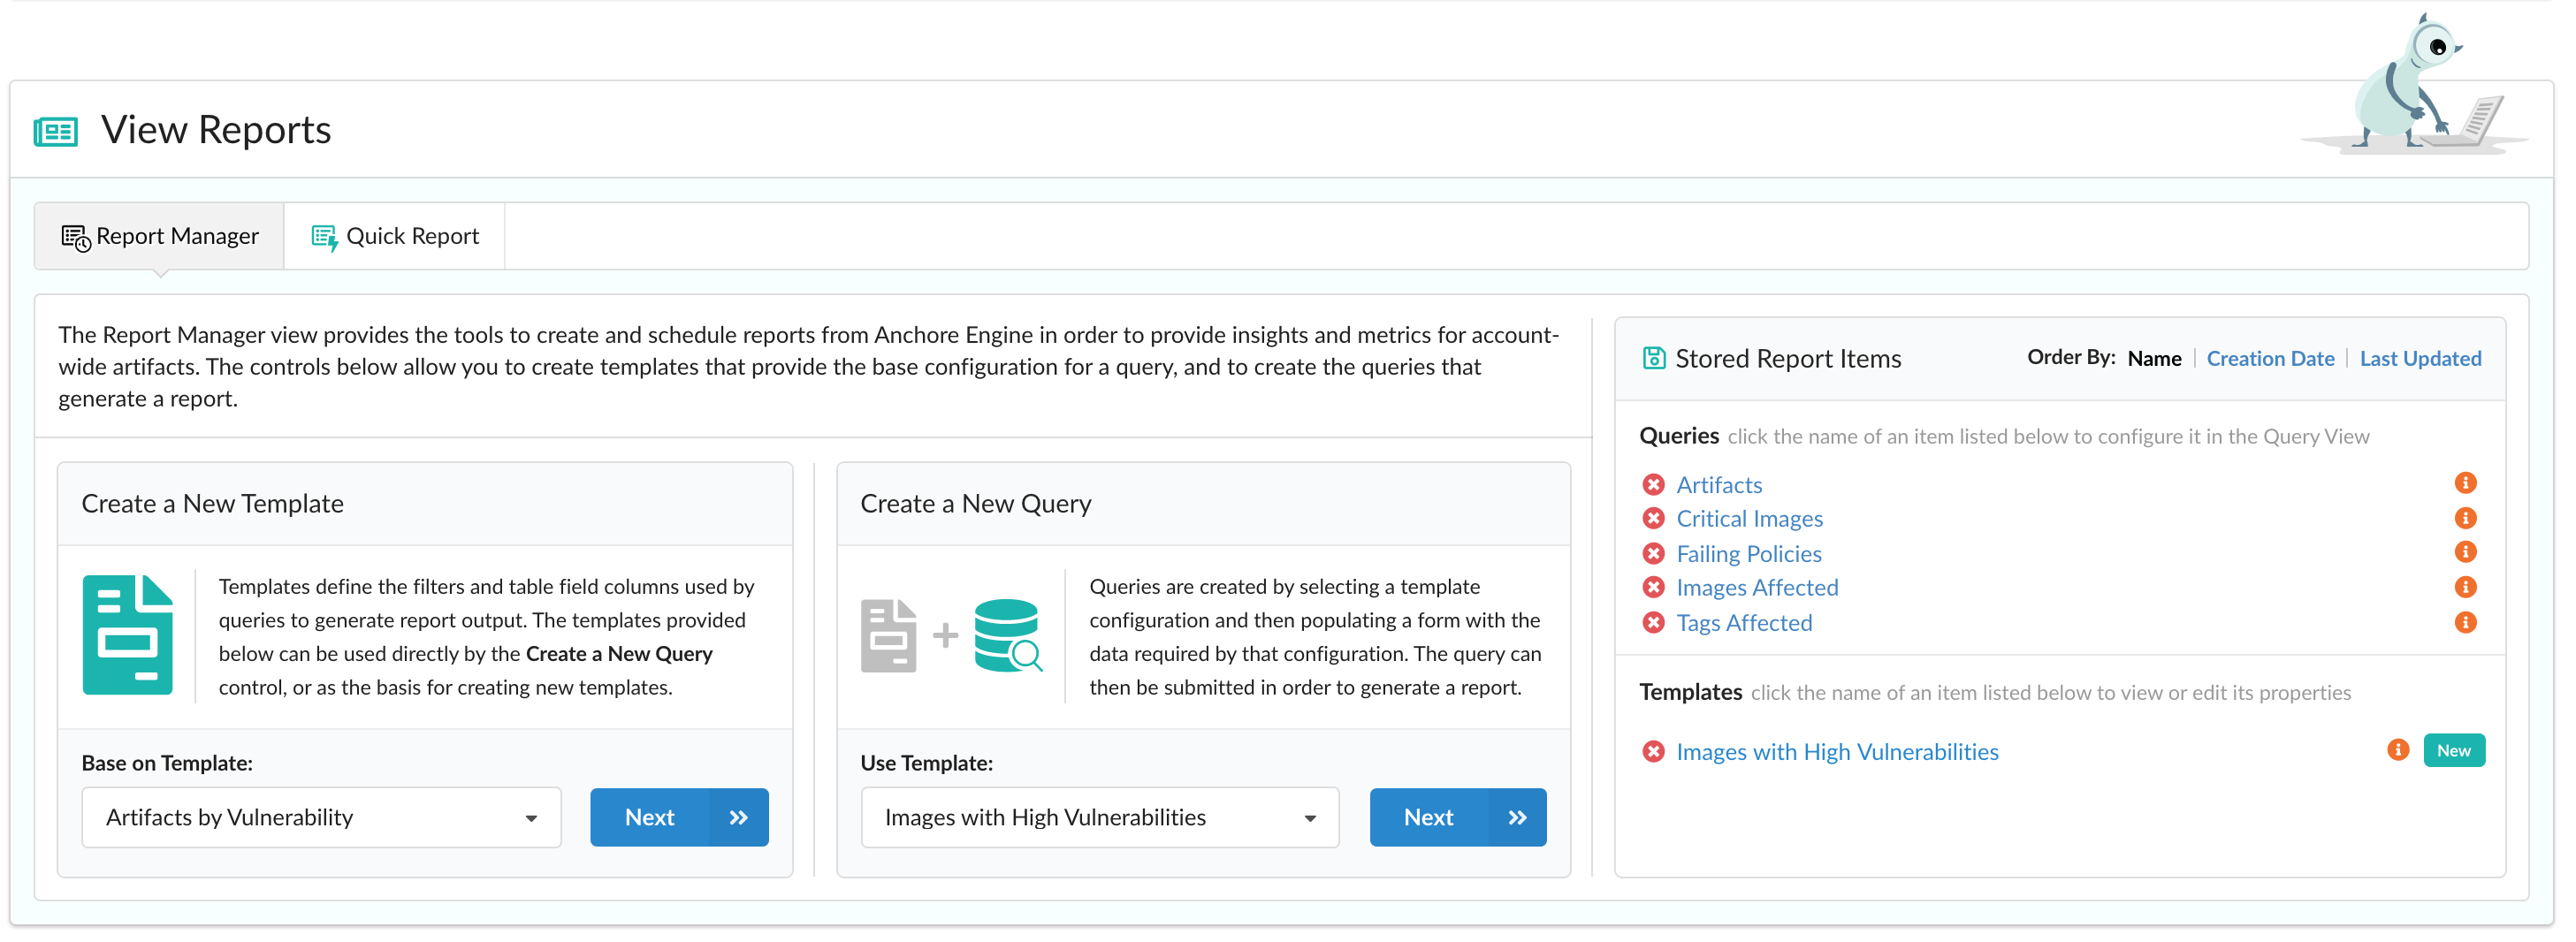
Templates define the filters and table field columns used by queries to generate report output. The templates provided by the sytem or stored by other users in your account can be used directly to create a new query or as the basis for crafting new templates.
System Templates
By default, the UI provides a set of system templates:
- Images Failing Policy Evaluation
- This template contains a customized set of filters and fields, and is based on “Policy Compliance History by Tag”.
- Images With Critical Vulnerabilities
- This template contains a customized set of filters and fields, and is based on “Images Affected by Vulnerability”.
- Artifacts by Vulnerability
- This templates contains all filters and fields by default.
- Tags by Vulnerability
- This templates contains all filters and fields by default.
- Images Affected by Vulnerability
- This templates contains all filters and fields by default.
- Policy Compliance History by Tag
- This templates contains all filters and fields by default.
- Vulnerabilities by Kubernetes Namespace
- This templates contains all filters and fields by default.
- Vulnerabilities by Kubernetes Container
- This templates contains all filters and fields by default.
- Vulnerabilities by ECS Container
- This templates contains all filters and fields by default.
Creating a Template
In order to define a template’s list of fields and filters, navigate to the Create a New Template section of the page, select a base configuration provided by the various System Templates listed above, and click Next to open a modal.
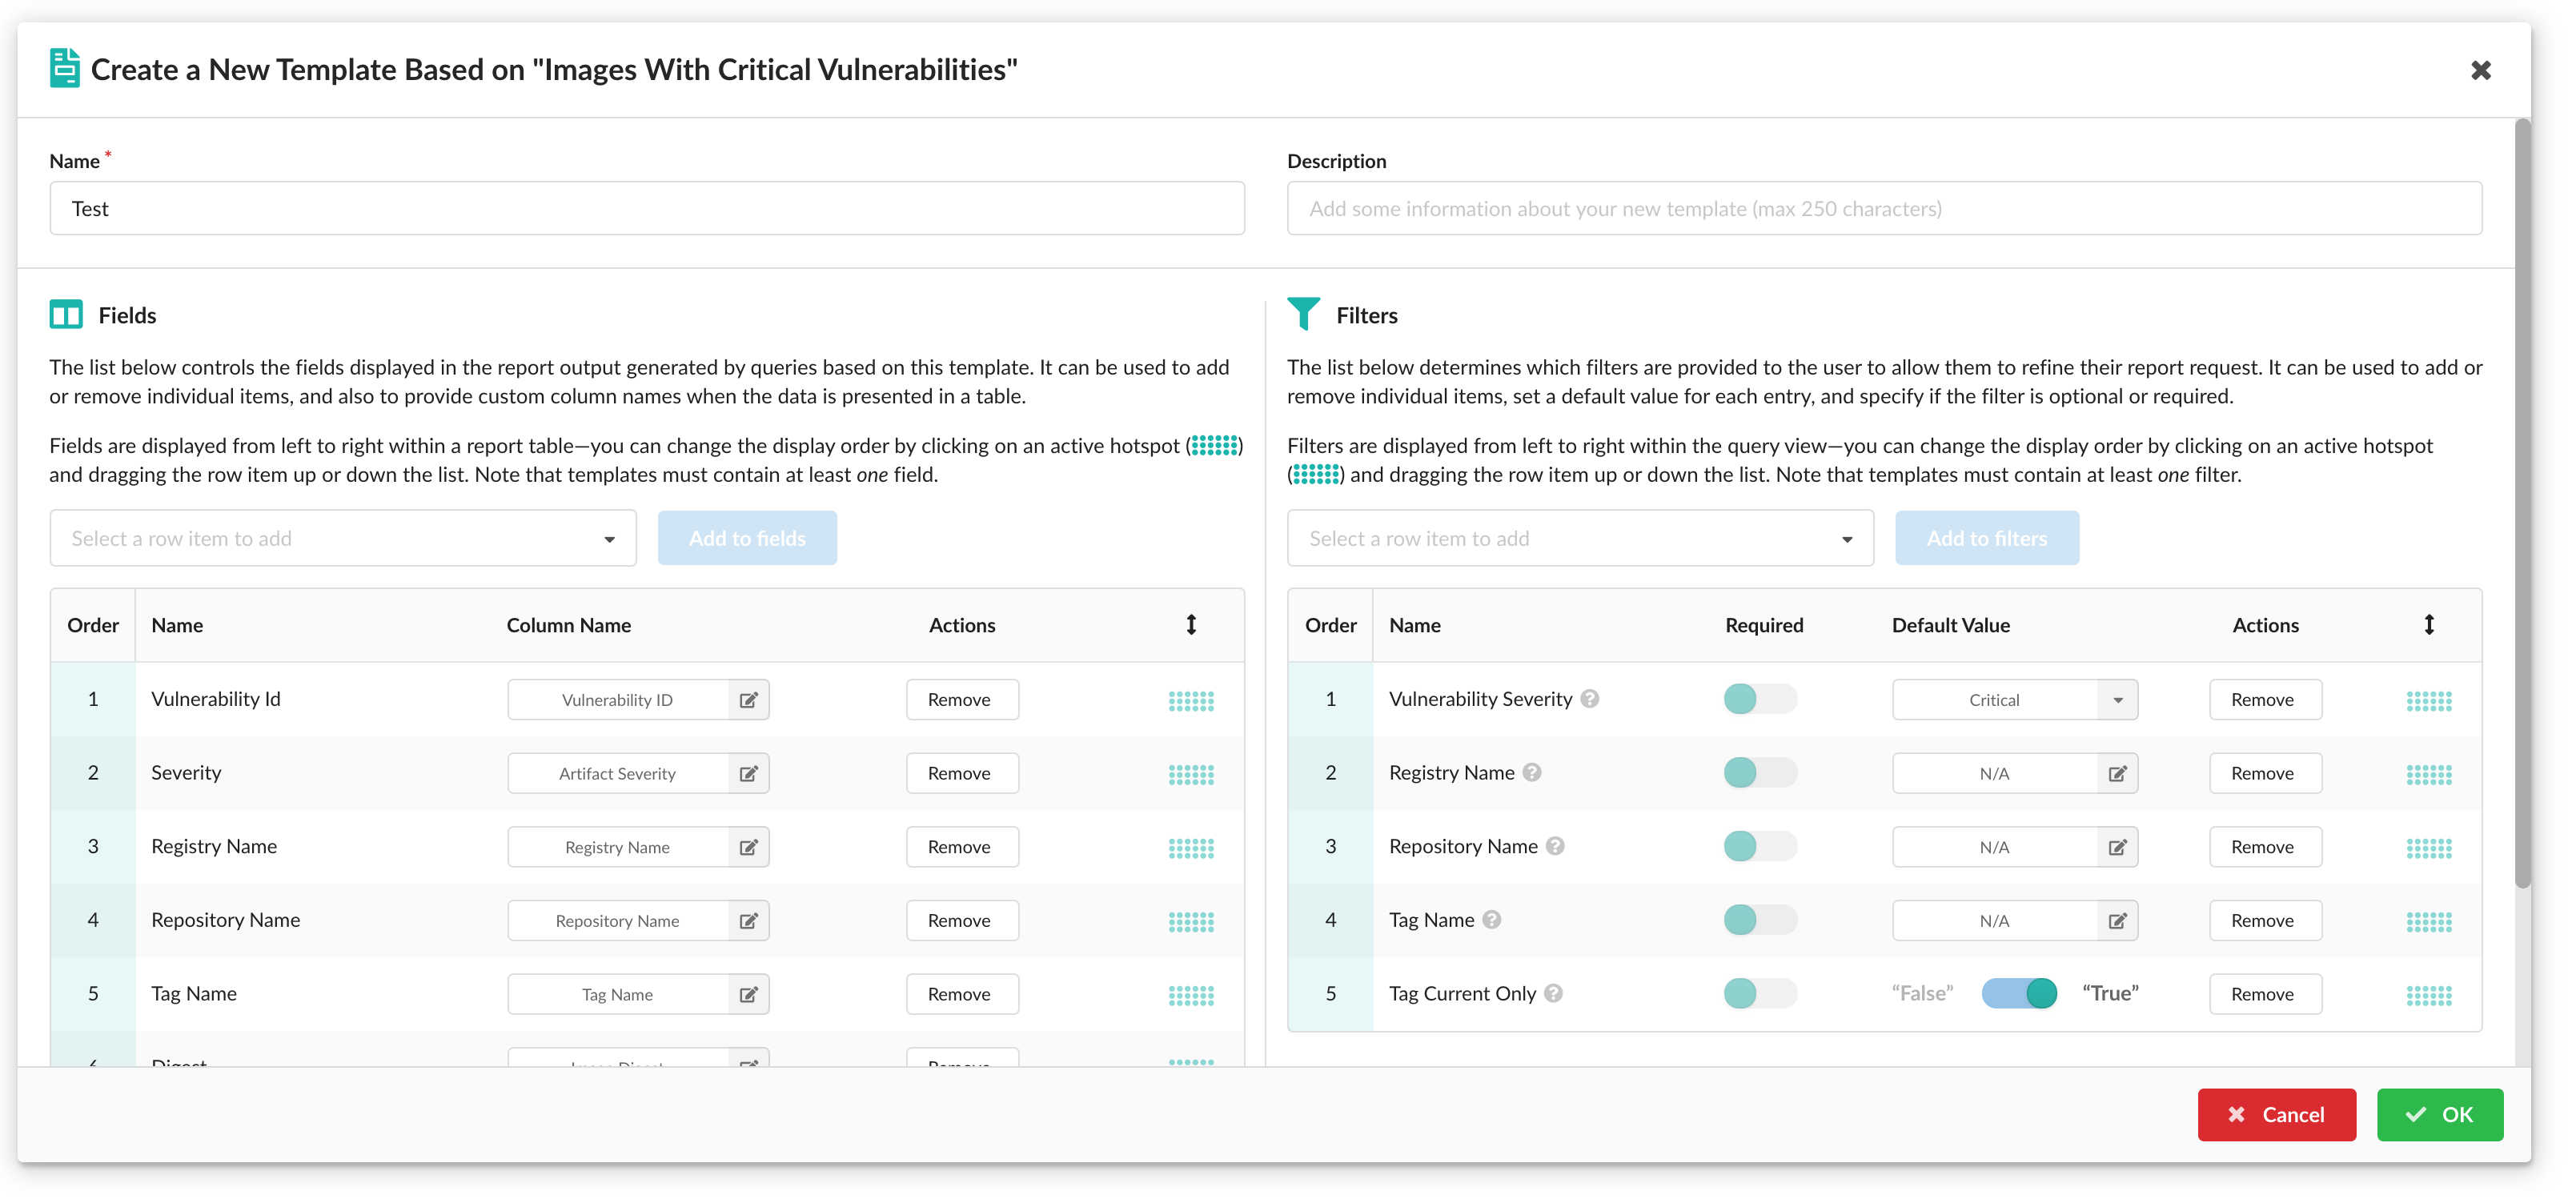
Provide a name for your new template, add an optional description, and modify any fields or filters to your liking.
The fields you choose control what data is shown in your results and are displayed from left to right within a report table. To optionally refine the result set returned, you can add or remove filter options, set a default value for each entry and specify if the filter is optional or required.
Note that templates must contain at least one field and one filter.
Once the template is configured to your satisfaction, click OK to save it as a Stored Template. Your new template is now available to hydrate a query or as a basis for future templates.
Editing a Template
To view or edit a template that has been stored previously, click its name under Stored Report Items on the right of the page. As with the creation of a template, the list of fields and filters can be customized to your preference.
When you’re done, click OK to save any new changes or Cancel to discard them.
Deleting a Template
To delete a template that you have configured previously, click the red “x” to the left of its name under Stored Report Items and click Yes to remove it. Note that once the template has been removed, you won’t be able to recover it.
Queries
Queries are based on a template’s configuration and can then be submitted to the back-end Enterprise Reporting Service on a reoccurring schedule to generate reports. These results can then be previewed in tabular form and downloaded in JSON or CSV format.
Creating a Query
To create a query, navigate to the Create a New Query section of the page, select a template configuration, and click Next to open a modal.
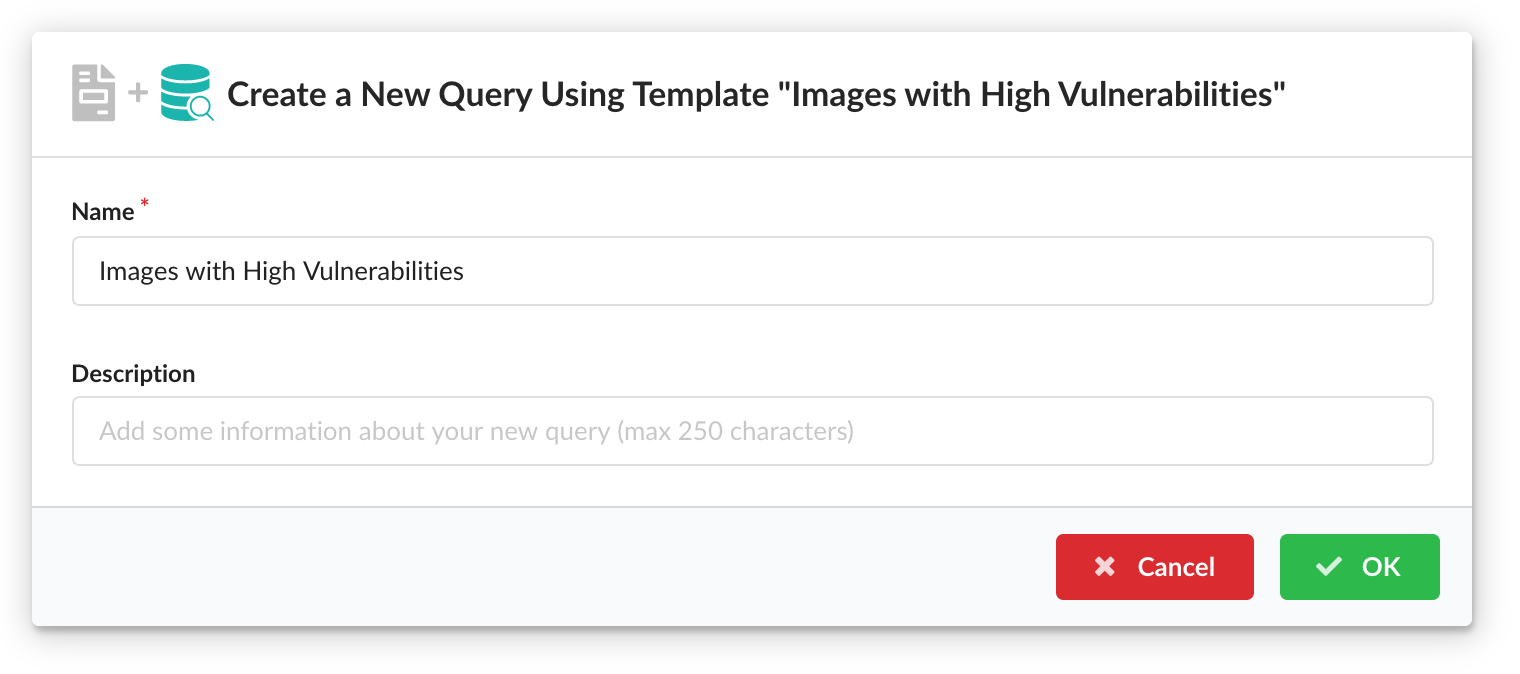
After you provide a unique name for the query and an optional description, click OK to save your new query. You will be automatically navigated to view it.
Editing a Query
To view or edit a query, click its name under Stored Report Items on the right of the page to be navigated to the Query View.
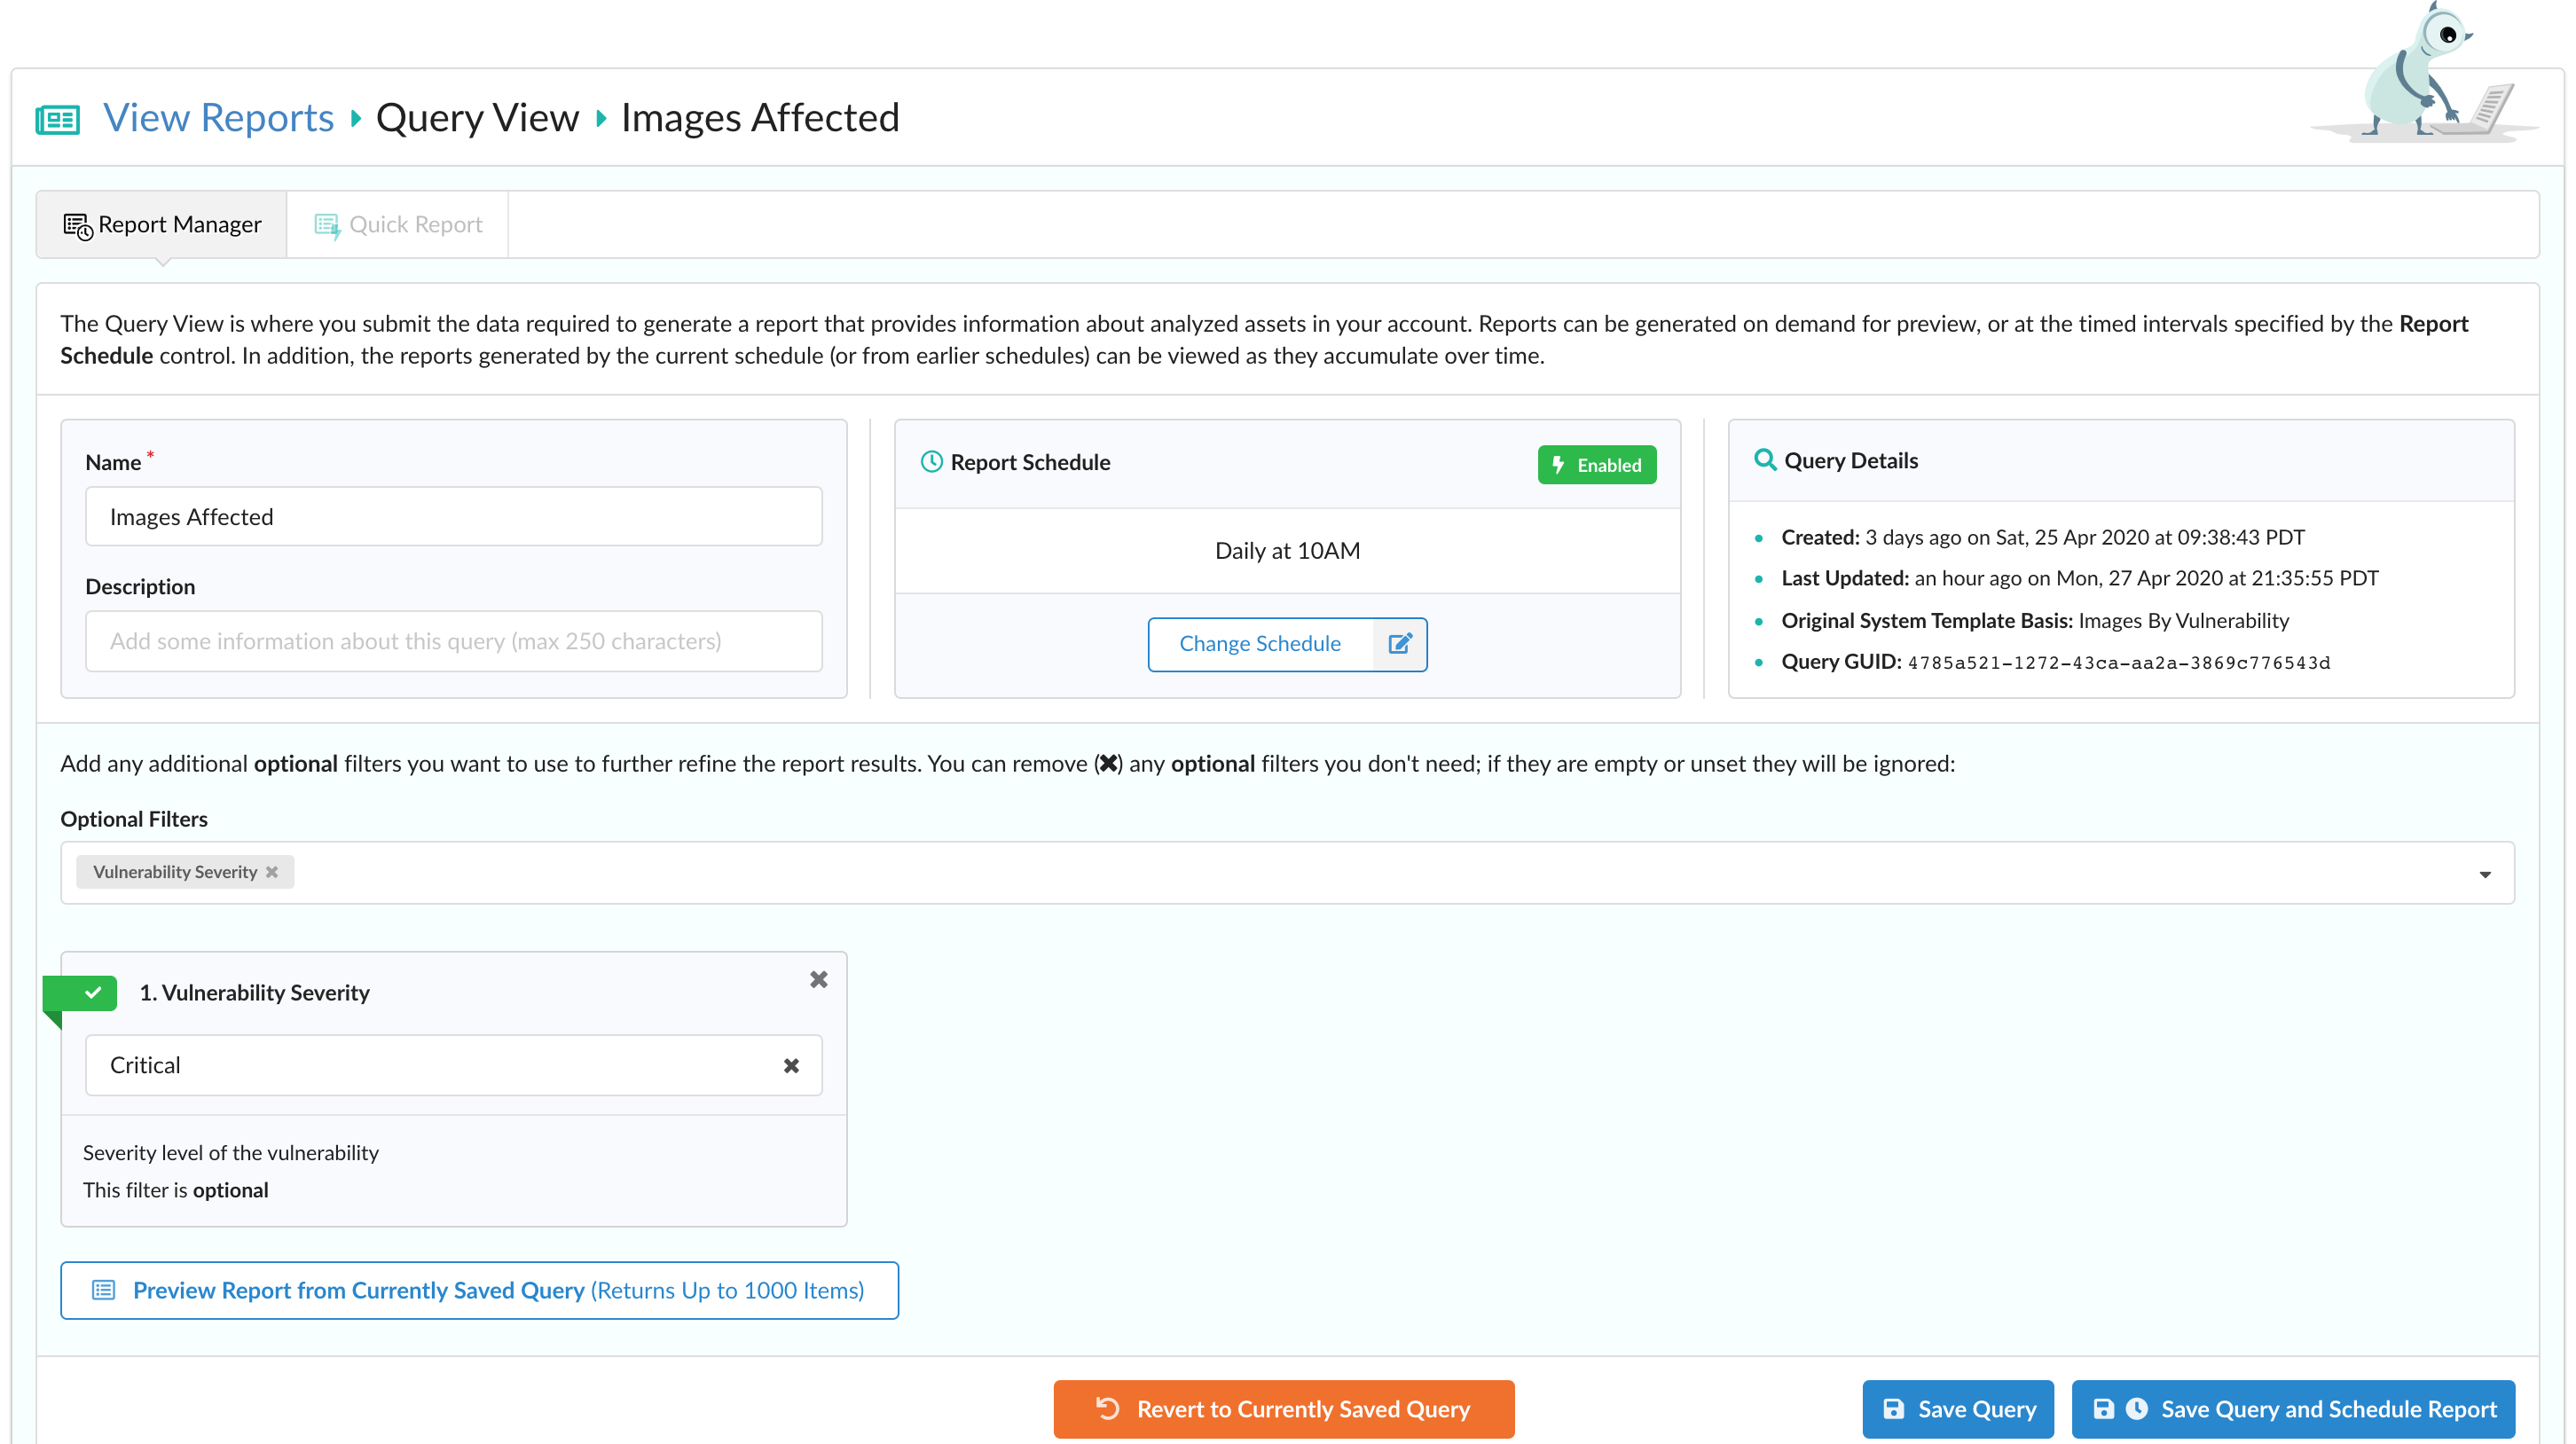
Within this view, you can edit its name and description, set a schedule to act as the base configuration for Scheduled Items, and view the various filters set by the template this query was based on.
To save any changes to the query, click Save Query or Save Query and Schedule Report.
Setting a Schedule
In order to set or modify a query’s schedule, click Add/Change Schedule to open a modal.
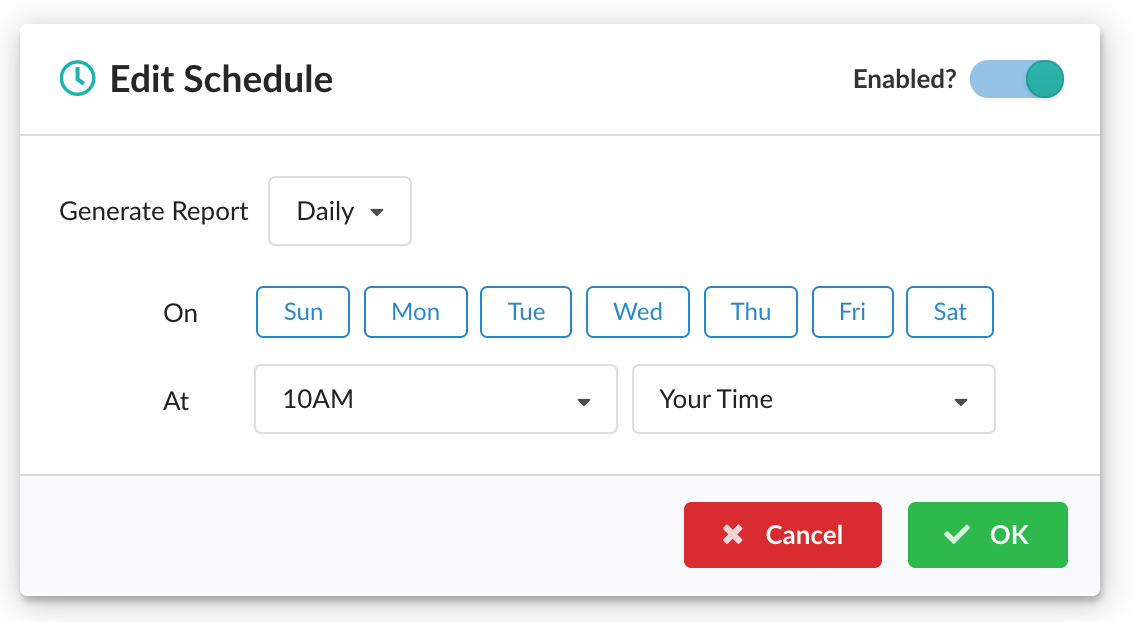
Reports can be generated daily, weekly, or monthly at a time of your choosing. This can be set according to your timezone or UTC. By default, the schedule is set for weekly on Mondays at 12PM your time.
When scheduling reports to be generated monthly, note that multiple days of the month can be selected and that certain days (the 31st, for example) may not trigger every month.
In the top-right corner of the modal, you can toggle the enabled state of the schedule which determines whether reports will be executed continuously on the timed interval you saved. Note that pressing OK modifies the schedule but does not save it to the query. Please click the Save Query or Save Query and Schedule Report to do so.
Deleting a Query
To delete a query, click the red “x” to the left of its name under Stored Report Items and click Yes to remove it. Note that every scheduled report associated with that query will also be removed and not be recoverable.
Scheduled Reports
Adding a Scheduled Item
Once you’ve crafted a query based on a system or custom template, supplied any filters to refine the results, and previewed the report generated to ensure it is to your satisfaction, you can add it to be scheduled by clicking Save Query and Schedule Report.
Any schedules created from this view will be listed at the bottom.
Editing a Scheduled Item
To edit a scheduled item, click on Tools within that entry’s Actions column and select Edit Scheduled Item to open a modal.
Here, you can modify the name, description, and schedule for that item. Click Yes to save any new changes or Cancel to discard them.
Deleting a Scheduled Item
To delete a scheduled item, click on Tools within that entry’s Actions column and select Delete Scheduled Item. Note that every report generated from that schedule will also be removed upon clicking Yes and will not be recoverable.
Viewing Results
Click View under a scheduled item’s Actions column to expand the row and view its list of associated reports sorted by most recent. Click View or Tools > View Results to navigate to that report’s results.
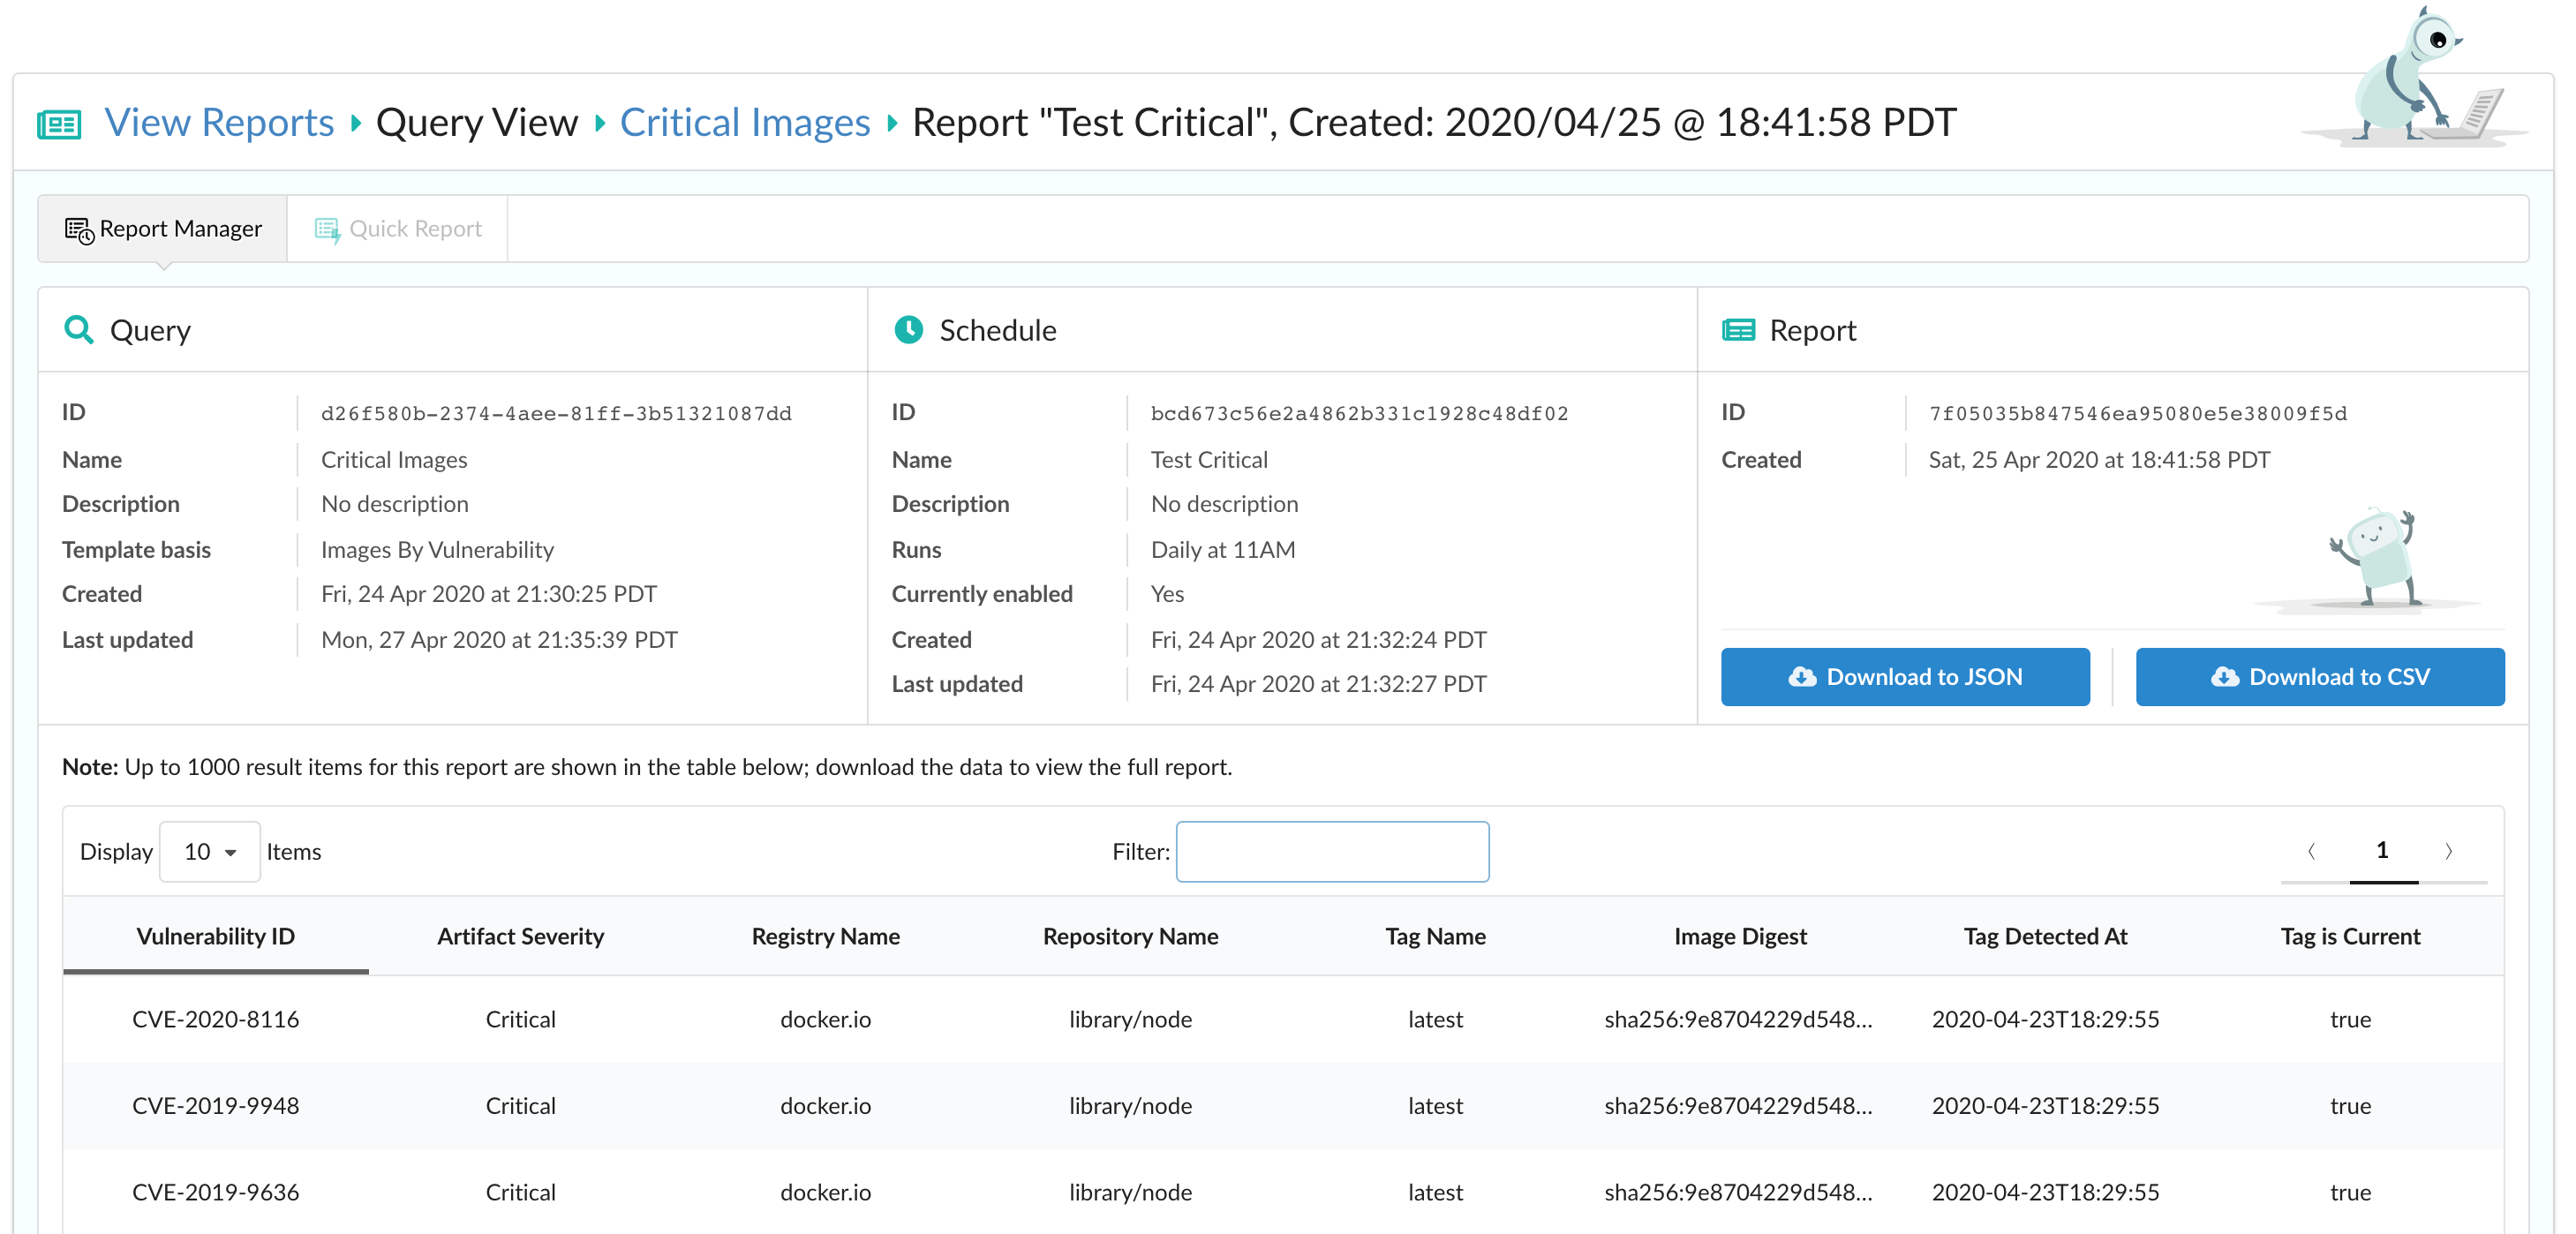
If you configured notifications to be sent when a report has been executed, you can navigate to the report’s results by clicking the link provided in its notification.
Downloading results
A preview of up to 1000 result items are shown in tabular form which provides optional sorting by clicking on any column header. If a report contains more than 1000 results, please download the data to view the full report. To do so, click Download to JSON or Download to CSV based on your preferred format.
Various metadata such as the report type, any filters used when querying, and the timestamp of the report are included with your results. Please note that depending on the size of your data, the download may take a while.
Configure Notifications
To be notified whenever a report has been generated, navigate to Events & Notifications > Manage Notifications. Once any previous notification configurations have loaded, add a new one from your preferred endpoint (Email, Slack, etc), and select the predefined event selector option for Scheduled Reports.

This includes the availability of a new result or any report execution failures.
Once you receive a notification, click on the link provided to automatically navigate to the UI to view the results for that report.