Policies
What is a policy?
A policy is composed of a set of rules that are used to perform an evaluation on a container image. These rules include (but are not limited to) checks on security, known vulnerabilities, configuration file contents, the presence of credentials in an image, manifest changes, exposed ports, or any user defined checks.
Policies can be deployed site wide, or customized to run against to specific images or categories of application. For additional information, refer to the Policy concepts section.
Once a policy has been applied to an image, it can return one of two results:
indicating that image complies with your policy
indicating that the image is non-compliant with your policy.
Rules
Each rule contained within a policy is configured with a check to perform—for example, check if blacklisted package openssh-server present. The policy additionally specifies the action to take place, based on the result of the evaluation.
| Action | Meaning |
|---|---|
| Critical error that should stop the deployment by failing the policy evaluation | |
| Issue a warning | |
| OK to proceed |
Policy rule checks are made up of gates and triggers. A gate is a set of policy checks against broad categories as as vulnerabilities, secret scans, licenses, and so forth, and will include one or more triggers, which are checks specific to the gate category.
Listing Policies
The area under the Policies subtab (shown above) in the policy editor contains a table that lists all of the policies defined within a selected policy bundle. The numeric indicator represents the overall number of polices currently defined in the bundle.
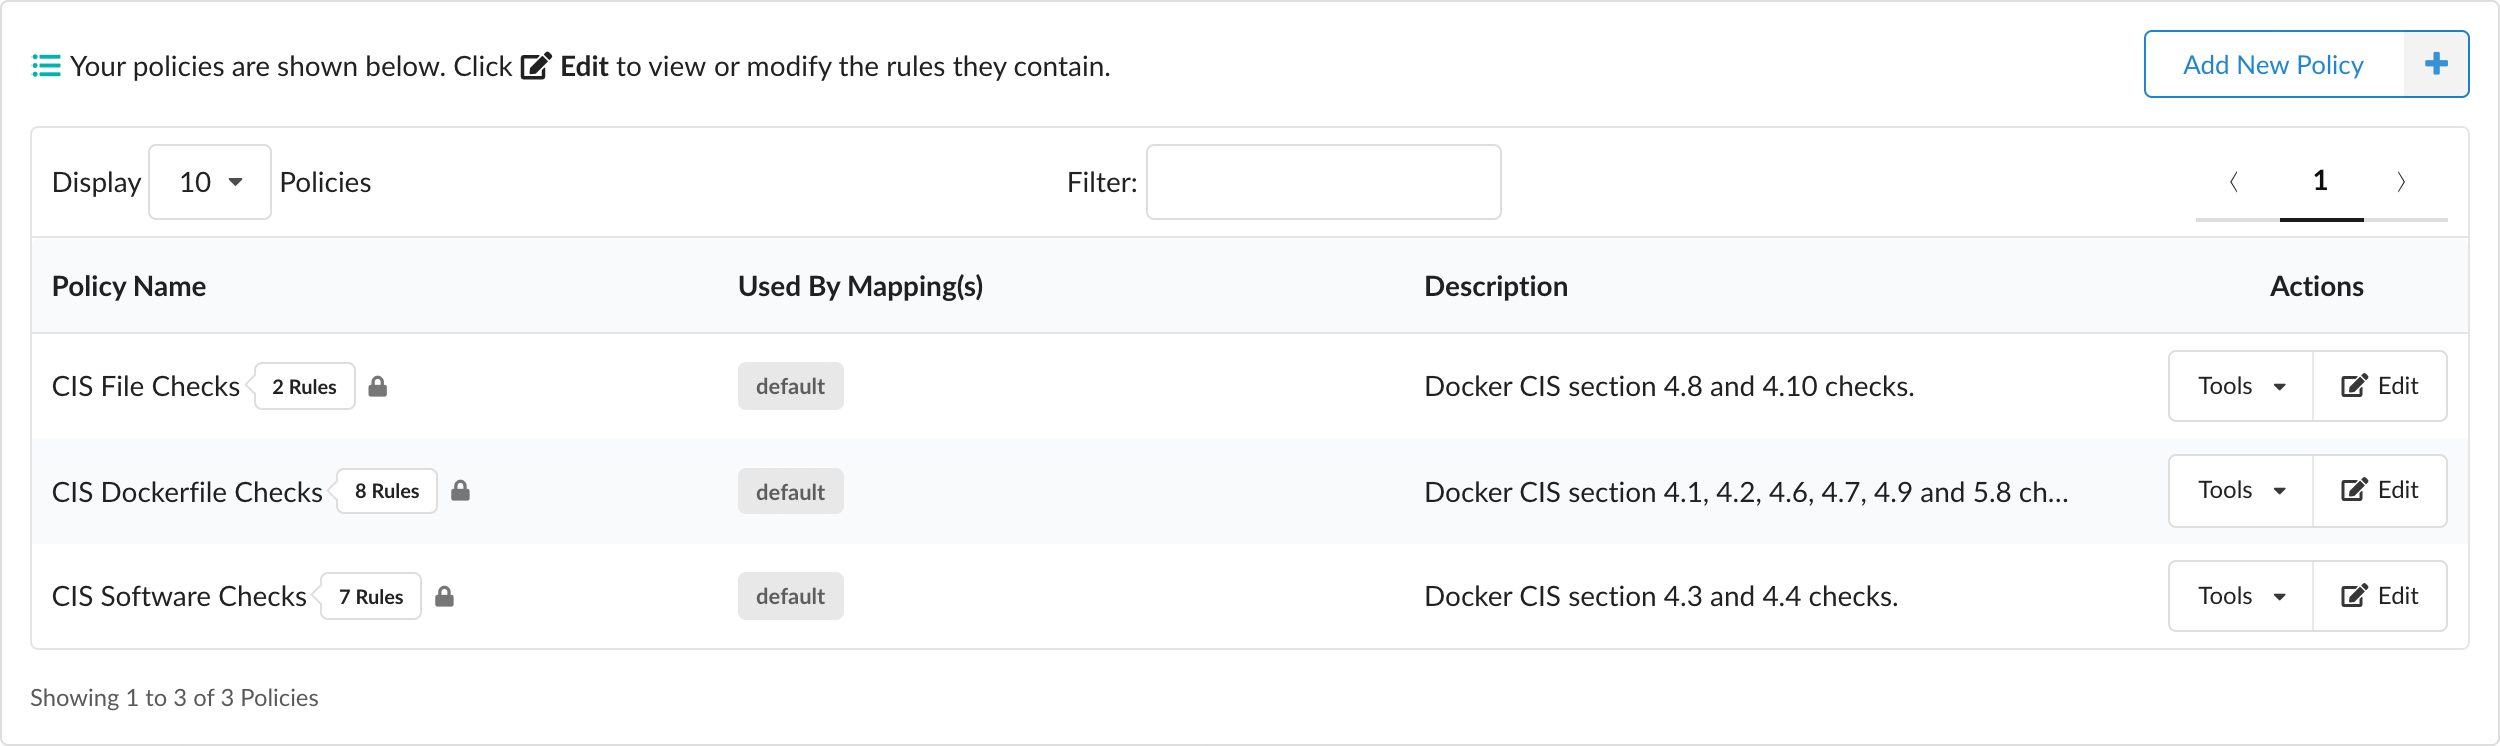
Adjacent to each name in the policy list is a counter that indicates the number of rules within that policy.
Note: A lock icon next to the rule counter indicates that the policy cannot be deleted. Policy rules that are used by policy mappings in the bundle (which will be listed under the Used By Mapping(s) column entry) cannot be deleted until they are removed from every associated mapping.
Tools
The Tools dropdown menu (shown above) in the Actions column provides options to:
- Edit the policy
- Copy the policy
- Download the policy as a JSON document
- Delete the policy (provided it is not being used by any policy mapping)
Adding a New Policy
The Add New Policy button (shown above) is used to add a new, empty policy. When clicked you are presented with a dialog where a unique name must be entered along with an optional (but recommended) description for your new policy:
Once you have saved the new policy by clicking the OK button, you are immediately taken to the policy rule editor, where you can start adding rules to your new policy.
Note: Existing policies may be modified by pressing the button or selecting Edit Policy from the associated Tools drop down menu.
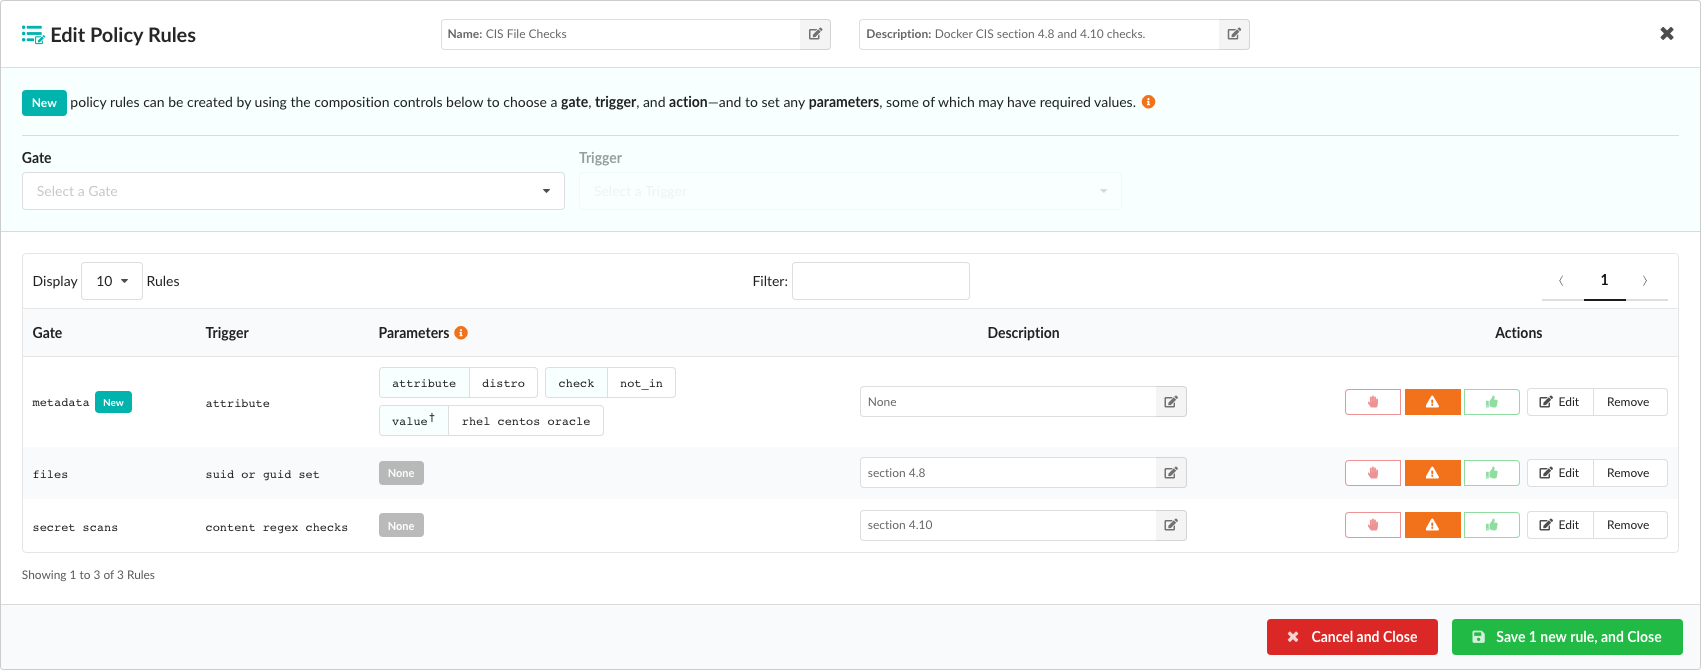
Editing Policies
From the Edit Policy Rules dialog you can change the policy name and description by pressing the corresponding buttons next to the Name and Description entries in the dialog header. You can also change any documentation associated with individual policy rules by editing the descriptions presented within each row of the table.
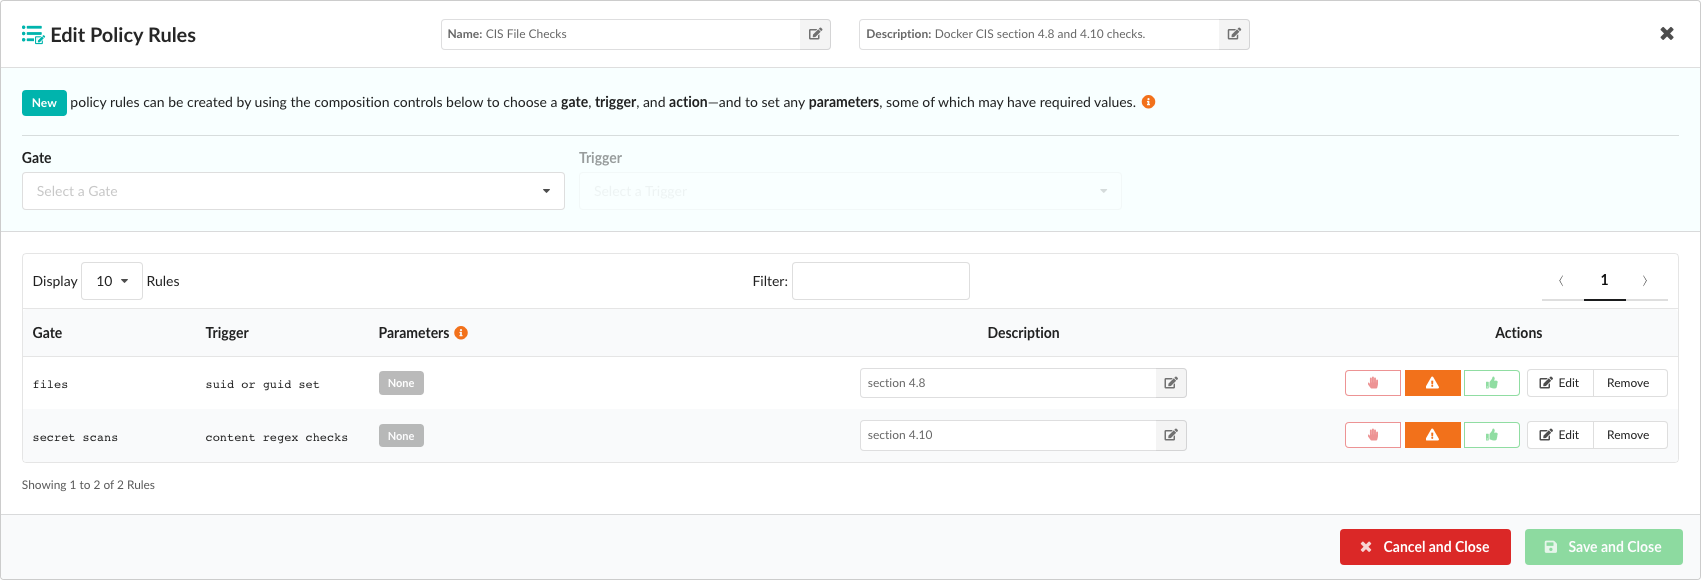
To add a new policy rule, you must first select an item from the Gate dropdown list, where each item represents a category of policy checks:
Note: After selecting a gate item, an information indicator will appear next to the dropdown label. Hovering over the indicator will provide some additional descriptive detail about the gate you have selected.
Once a gate has been selected, the Triggers drop down will be populated with all the specific checks associated with this item:
Triggers may have parameters, some of which may be optional. If any optional parameters are associated with the trigger you select, these will also be displayed in an additional field where they can be added or removed. Optional parameters are described in more detail in the next section.
In the example below the stale feed data trigger has a single mandatory parameter: max days since sync:
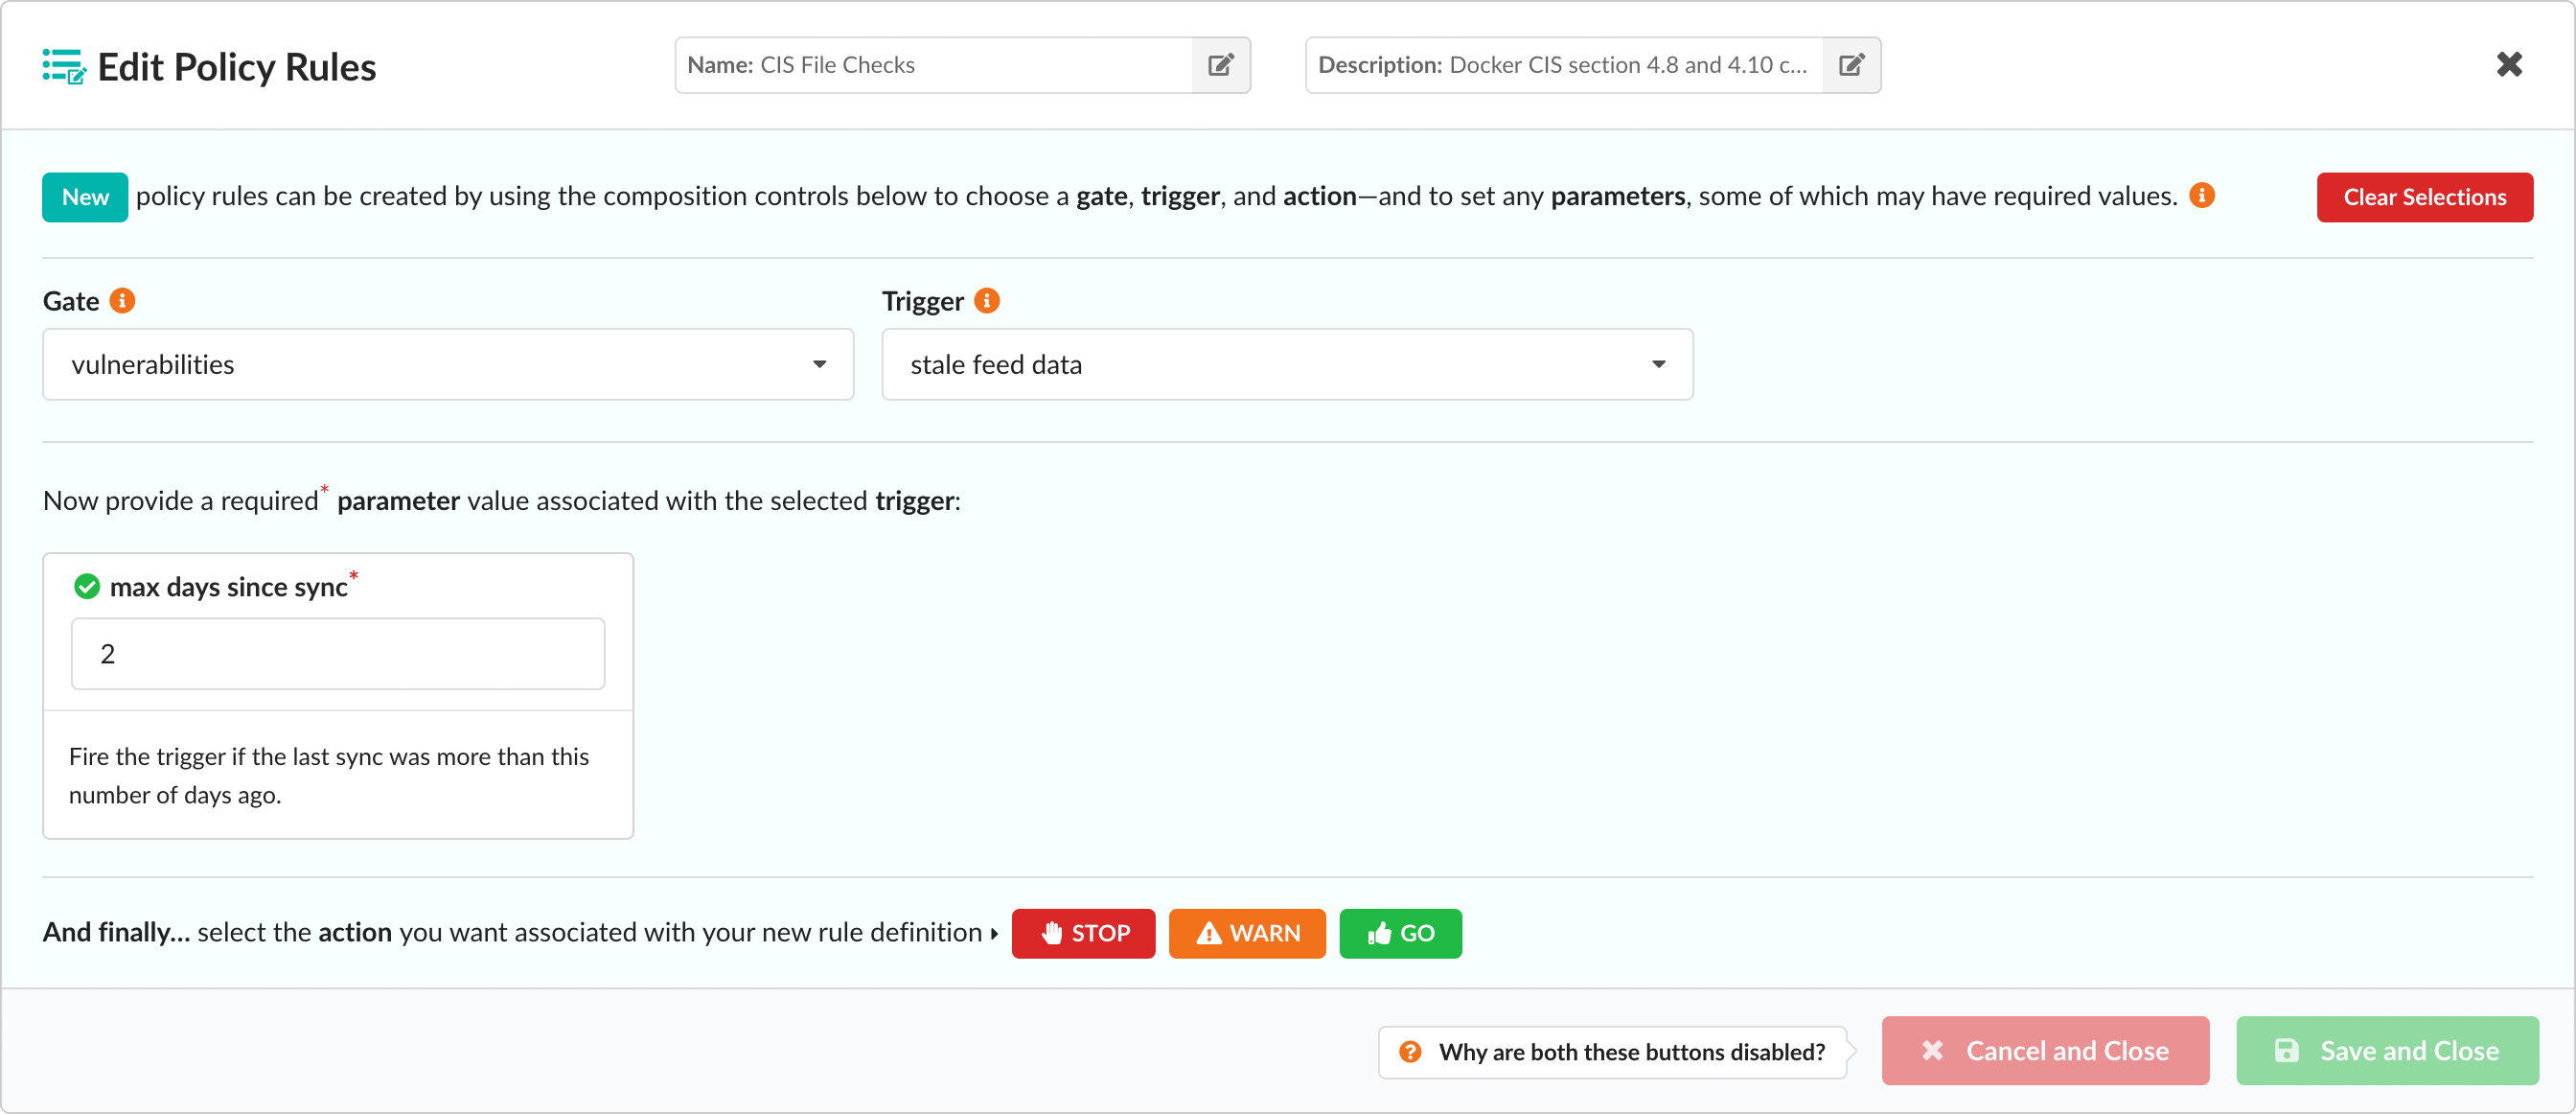
Once a value (in this example the number of days) has been entered into the parameter field, you can then select the action to perform if this condition is met:
The Action buttons are only displayed once all required parameters have been provided, or if no mandatory parameters are required. Once an action has been selected, the rule is added to the main list of rules contained in the policy.
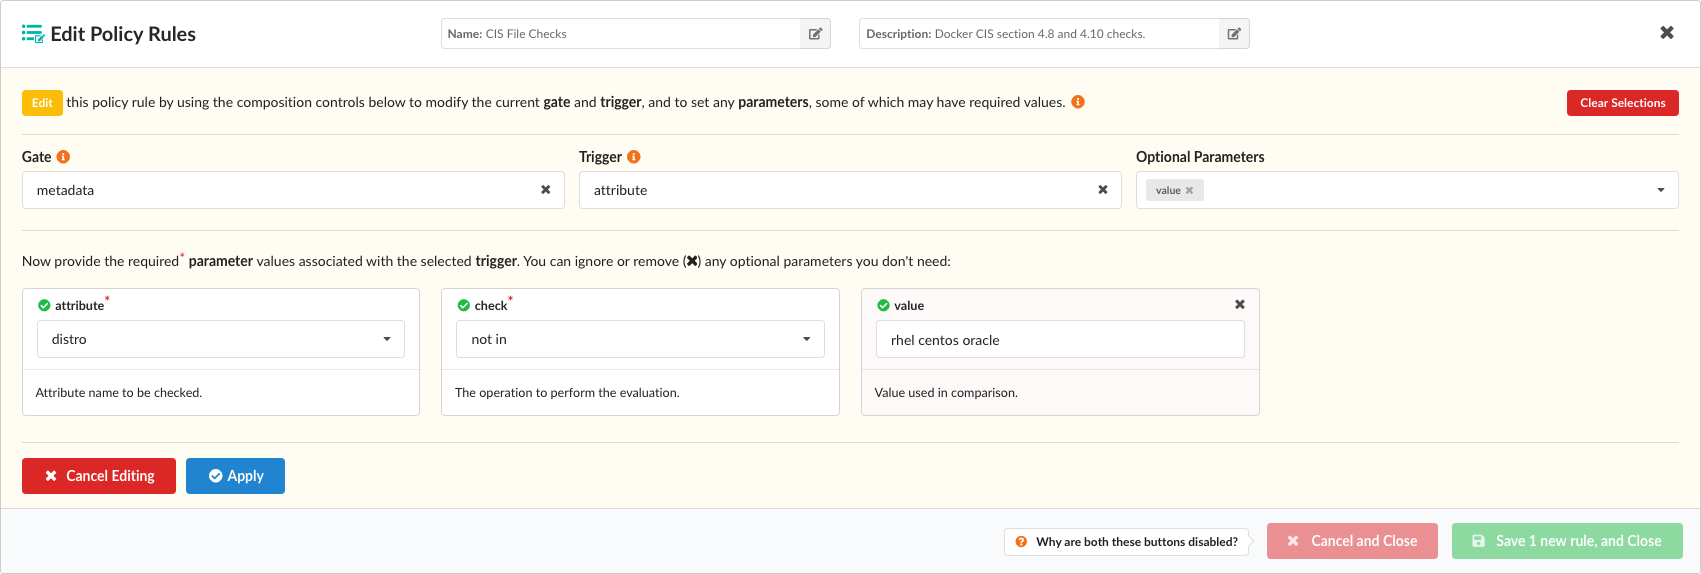
The following example described a more sophisticated policy check. The metadata gate has a single trigger that allows checks to be performed against various attributes of an image, including image size, architecture, and operating system distribution:
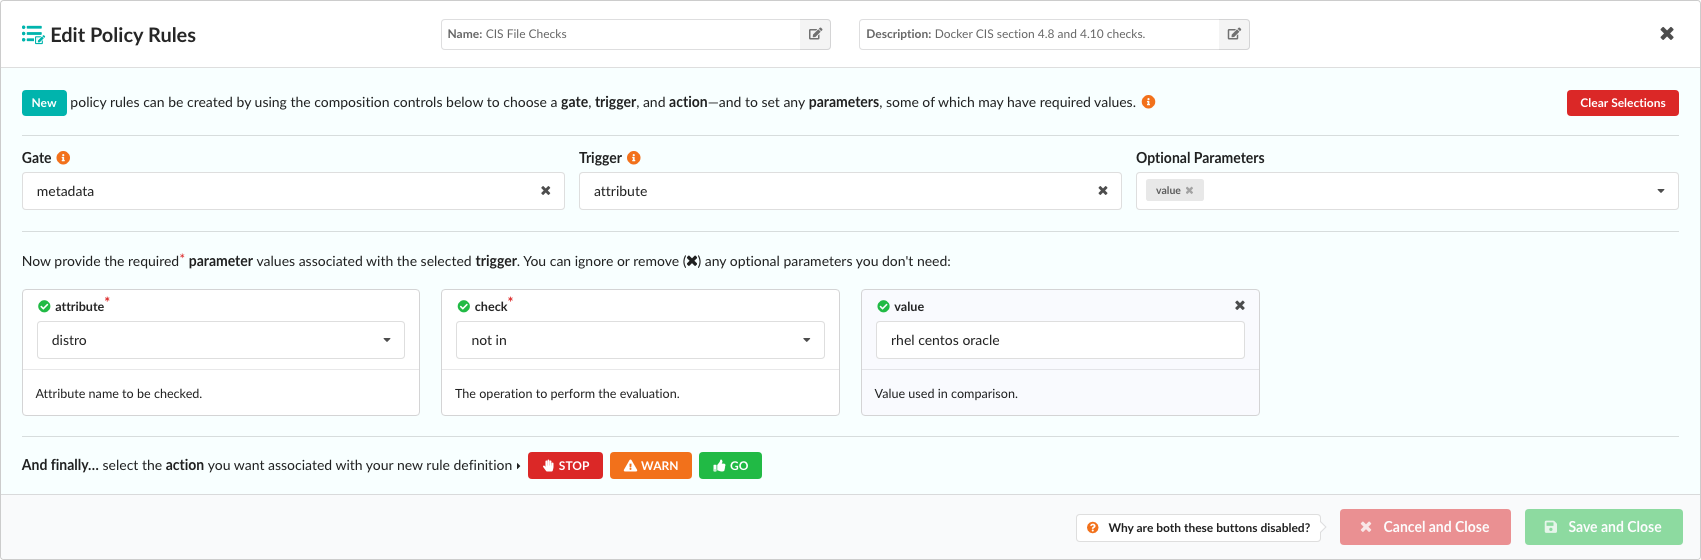
The Attribute parameter dropdown includes a number of attributes taken from image metadata, including the operating system distribution, number of layers, and architecture of the image (AMD64, ARM, and so forth):
Once an attribute has been selected, the Check dropdown is used to create a comparison expression:
The type of comparison varies based on the attribute. For example the numeric comparison operators such as >, <, >= would be relevant for numeric field such as size, while other operators such as not in may be useful for querying data field such as distro.
In this example, by entering rhel centos oracle in the Value field, our rule will check that the distro (that is, the operating system) under analysis is not RHEL, Centos, or Oracle:

Optional Parameters
If a trigger has optional parameters, they will be automatically displayed in the policy editor and an editable field next to the Triggers dropdown will show all the current selections:
In the example above, a trigger has two optional parameters, both of which are currently displayed.
Unneeded optional parameters can be removed either by clicking the X button associated with each entry in the Optional Parameters list, or by clicking the X button within each associated parameter block:
If an optional parameter is removed, it can be reapplied to the rule by clicking the Optional Parameters field and selecting it from the resulting dropdown list:
Editing Rules
After a rule has been added to the policy, it will be displayed in the the edit policy list page as a new entry. The final action of each rule can be modified by clicking the STOP, WARN, or GO buttons.
Unwanted rules may be discarded using the Remove button, and rules may be edited by selecting the Edit button.
After modifying the existing rule, click Apply and the rule will be updated. When you are satisfied that all your new (or updated) rules are correct, you can click the Save button to update and store your policy bundle.
Feedback
Was this page helpful?
Glad to hear it! Please tell us how we can improve.
Sorry to hear that. Please tell us how we can improve.